4
4
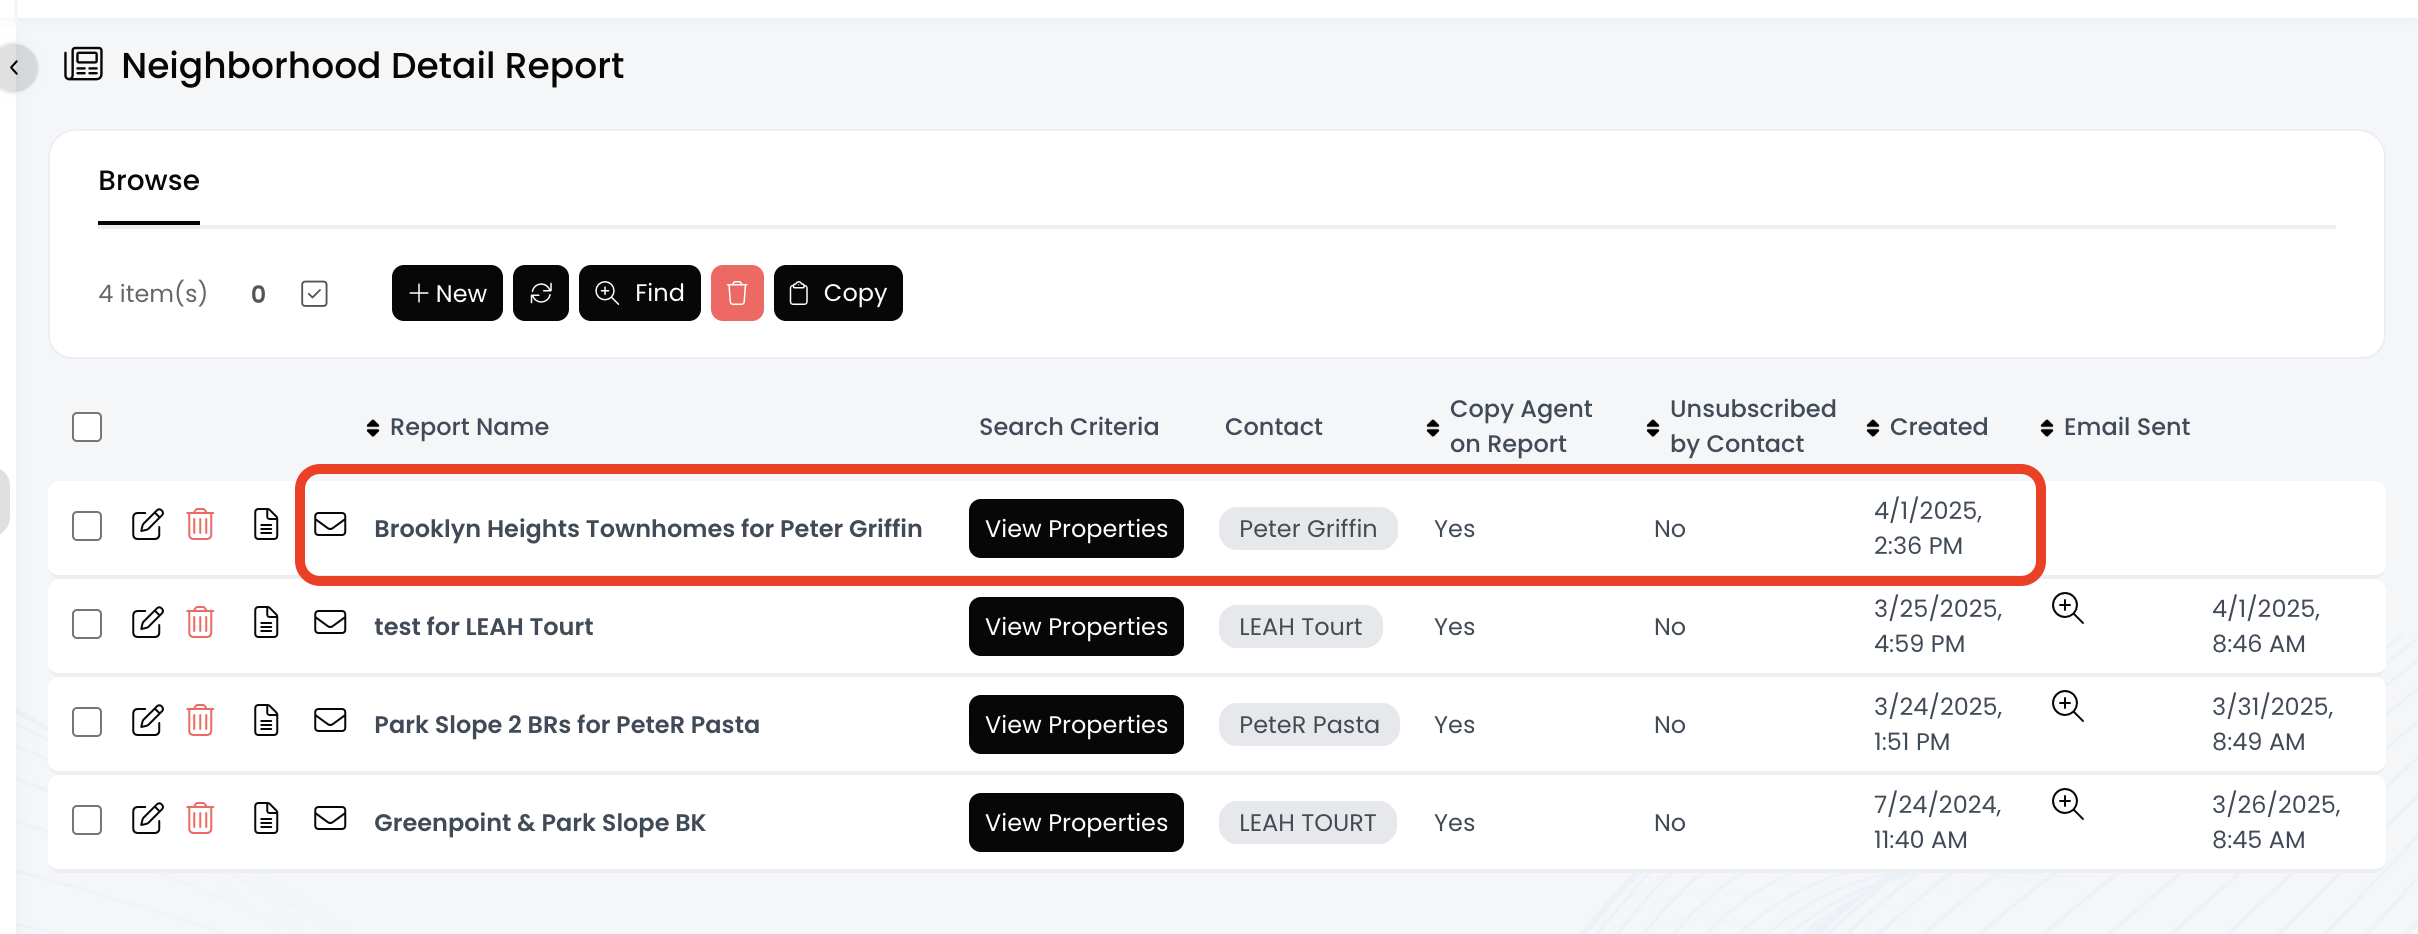
Sending a Neighborhood Detail Report is a great way to provide your leads with sales activity information for their neighborhood of interest. To learn more about the information included in a Neighborhood Detail Report, check out the other tutorials about basic details and metrics tracked.
This tutorial will show you how to create a report for a contact and their spouse/family member/partner/etc.
📺 Click here to watch a video tutorial 📺
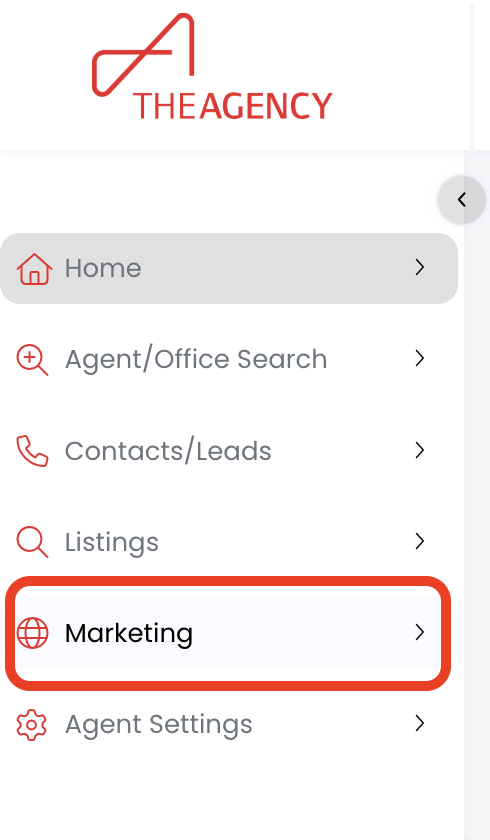
1.) Click on the Marketing menu
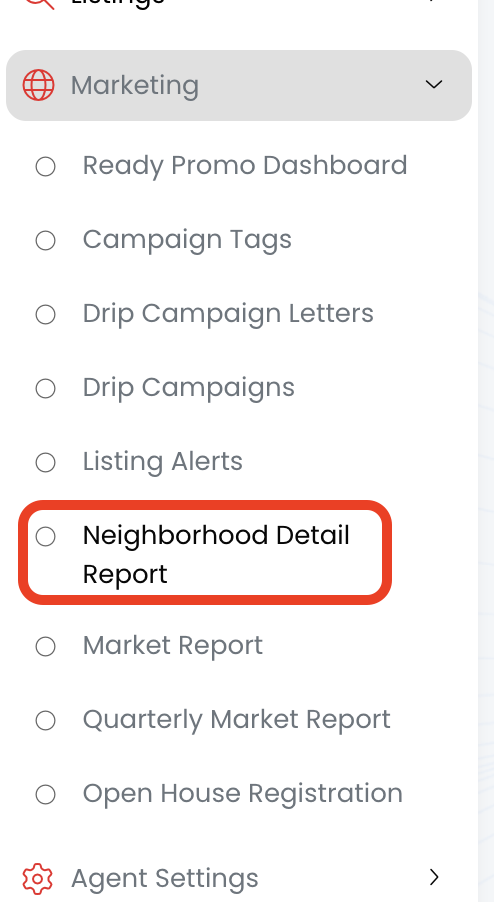
2.) Click on Neighborhood Detail Report
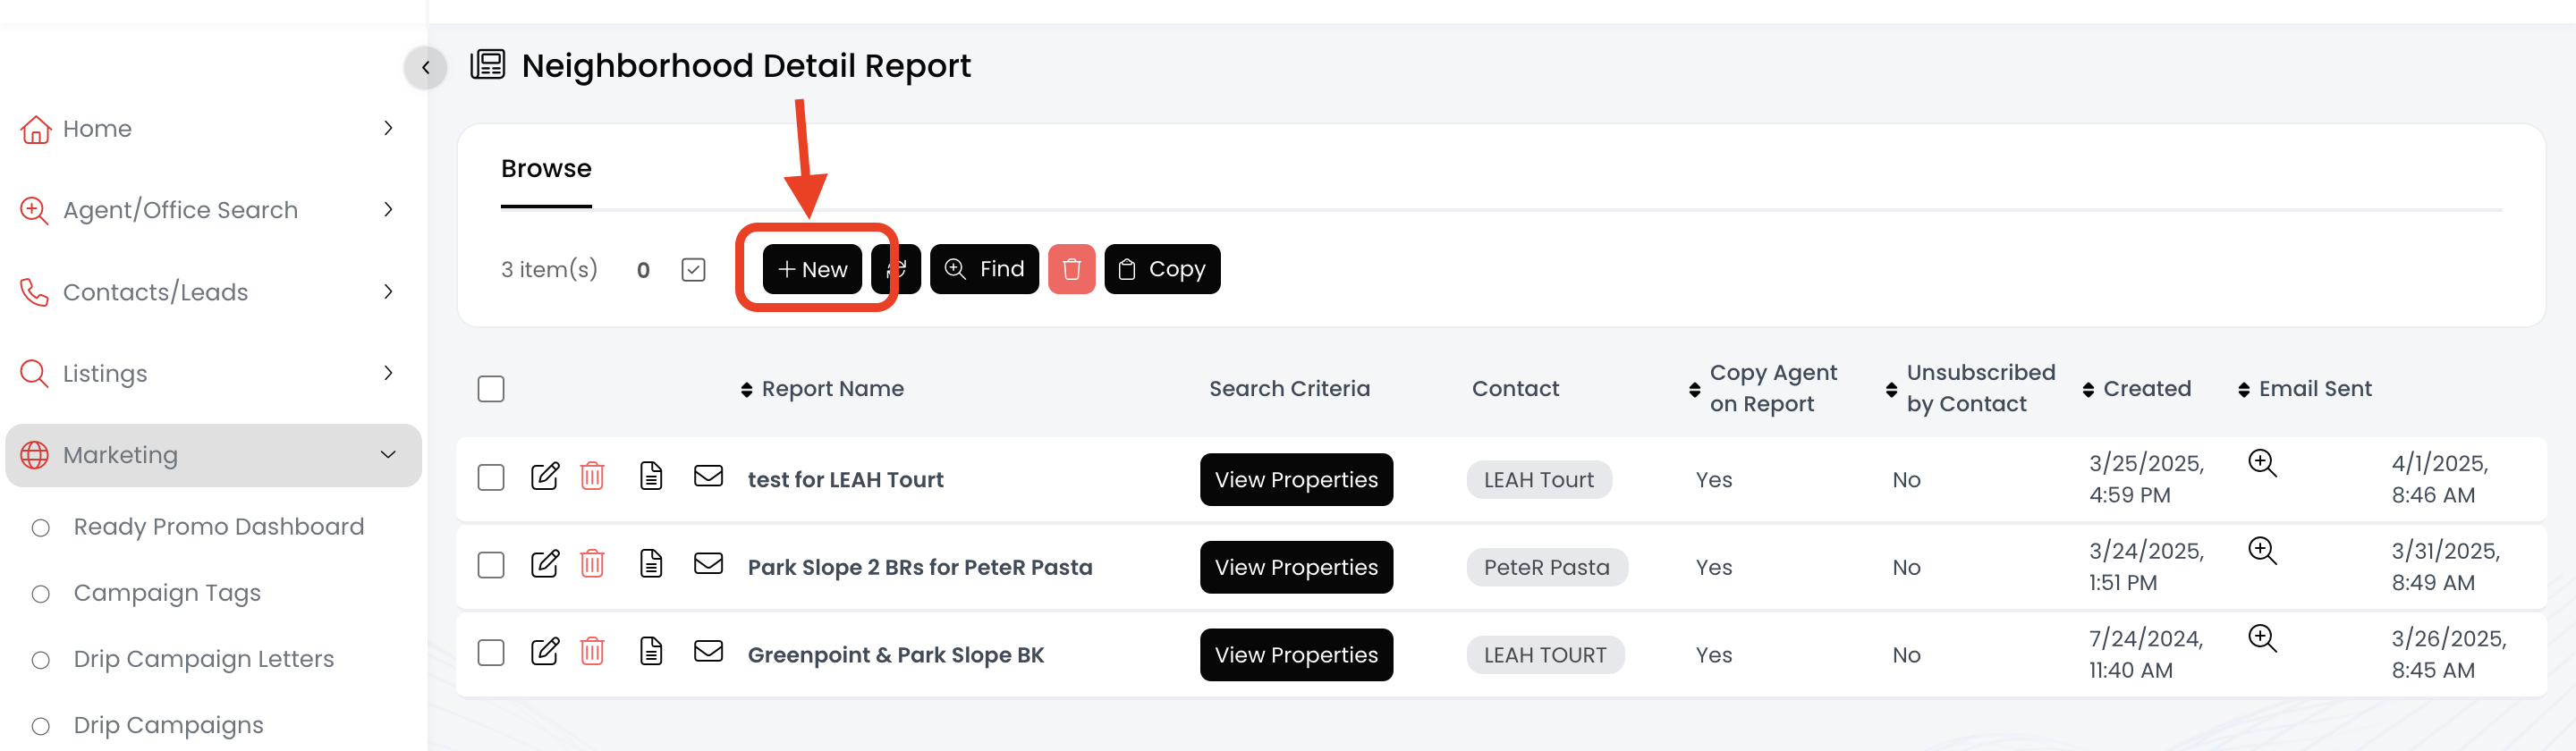
3.) Click on the + New button
4.) Add a Report Name
- Include the report details like the areas and/or property types
- Exclude the contact's name - The name is automatically added to the end of the Report Name after you save it
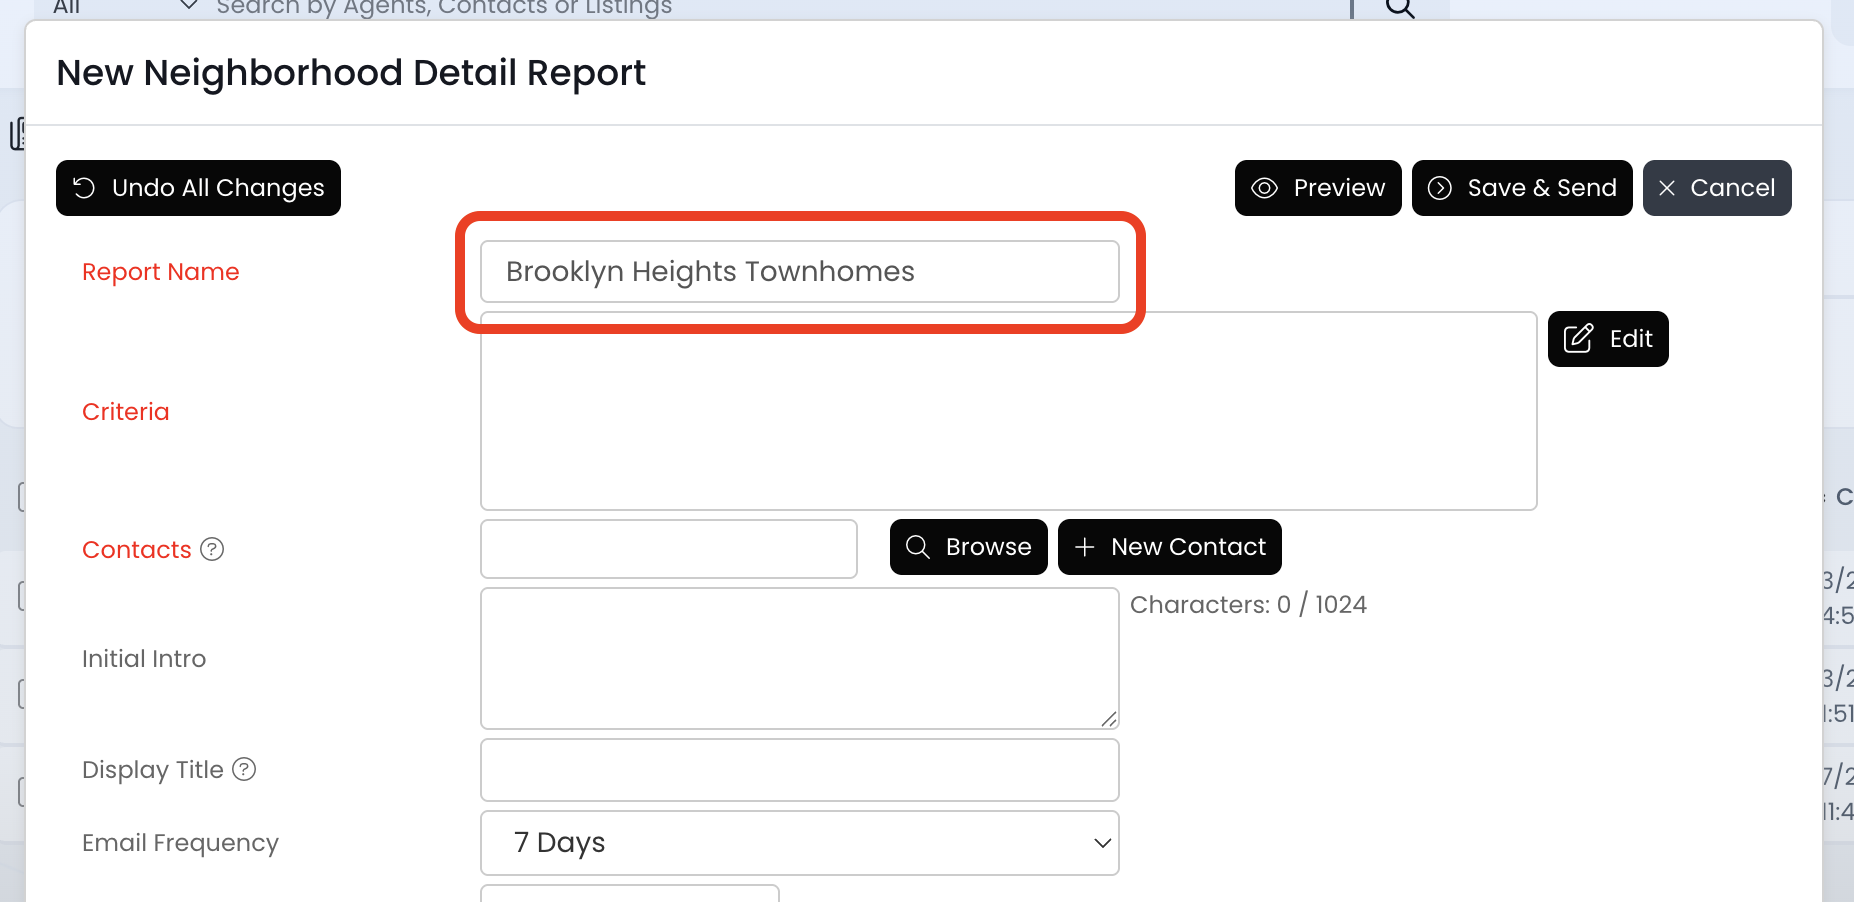
5.) Click on the Edit button to add criteria

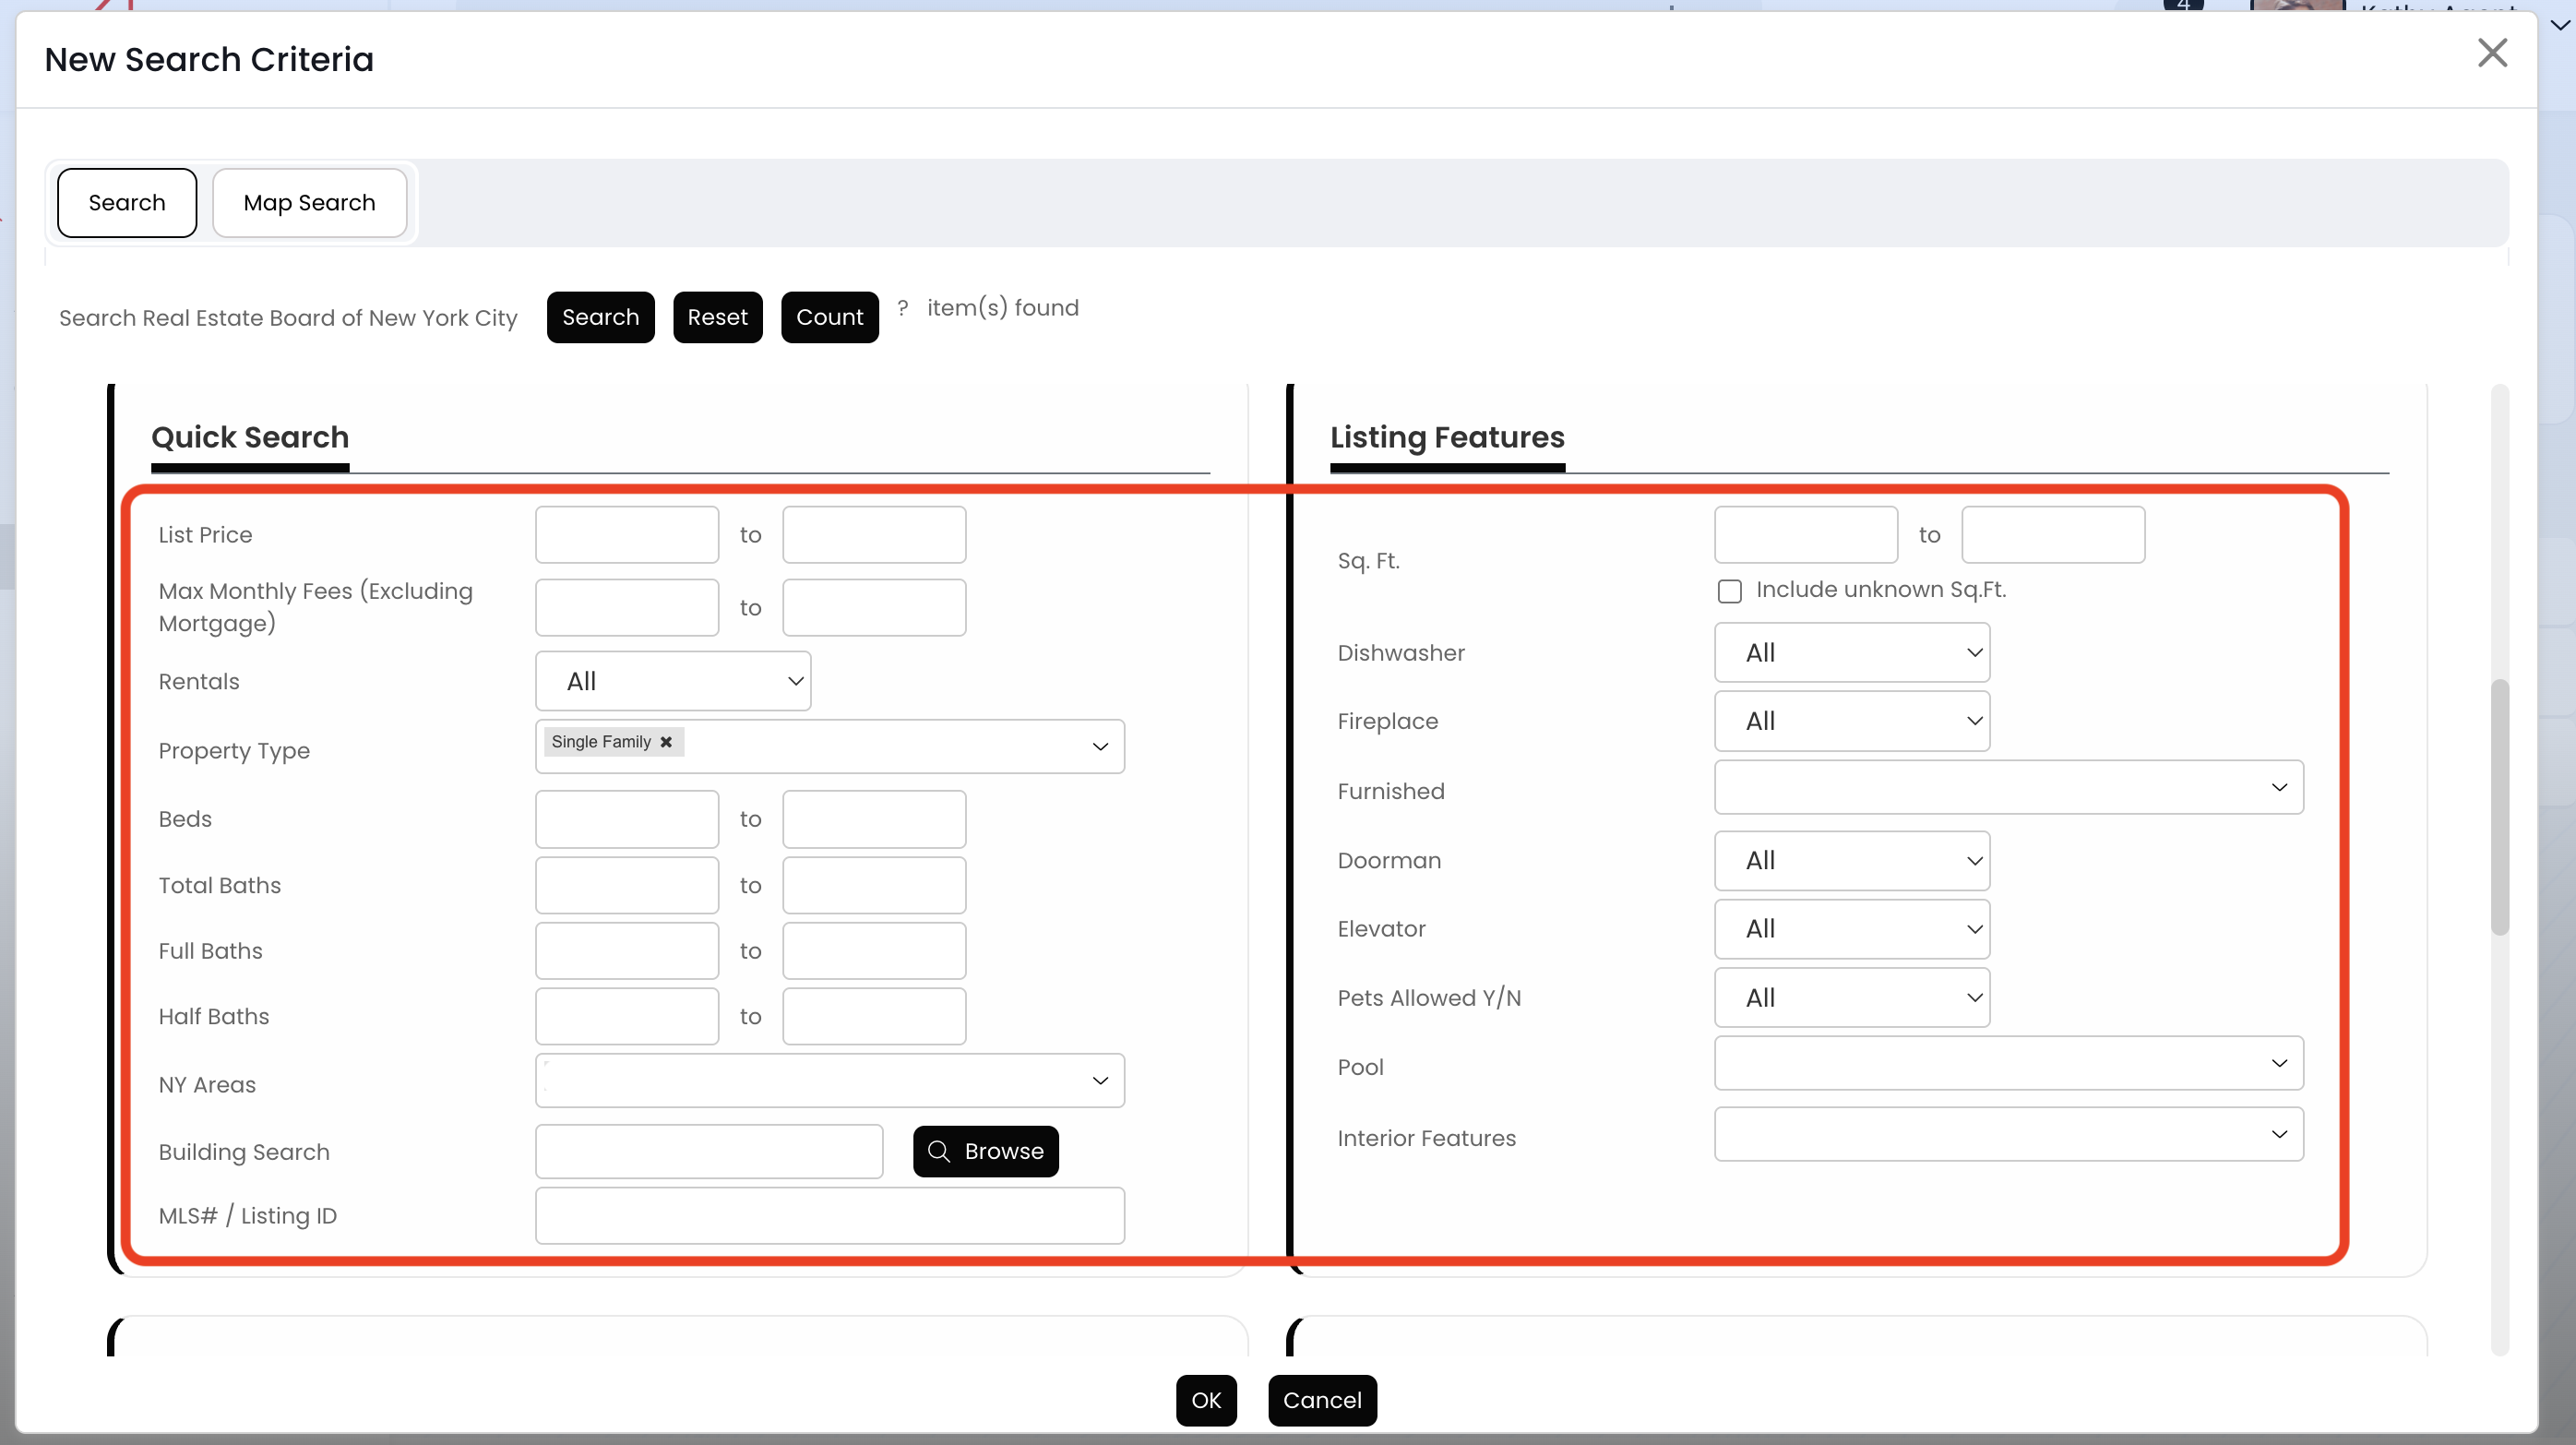
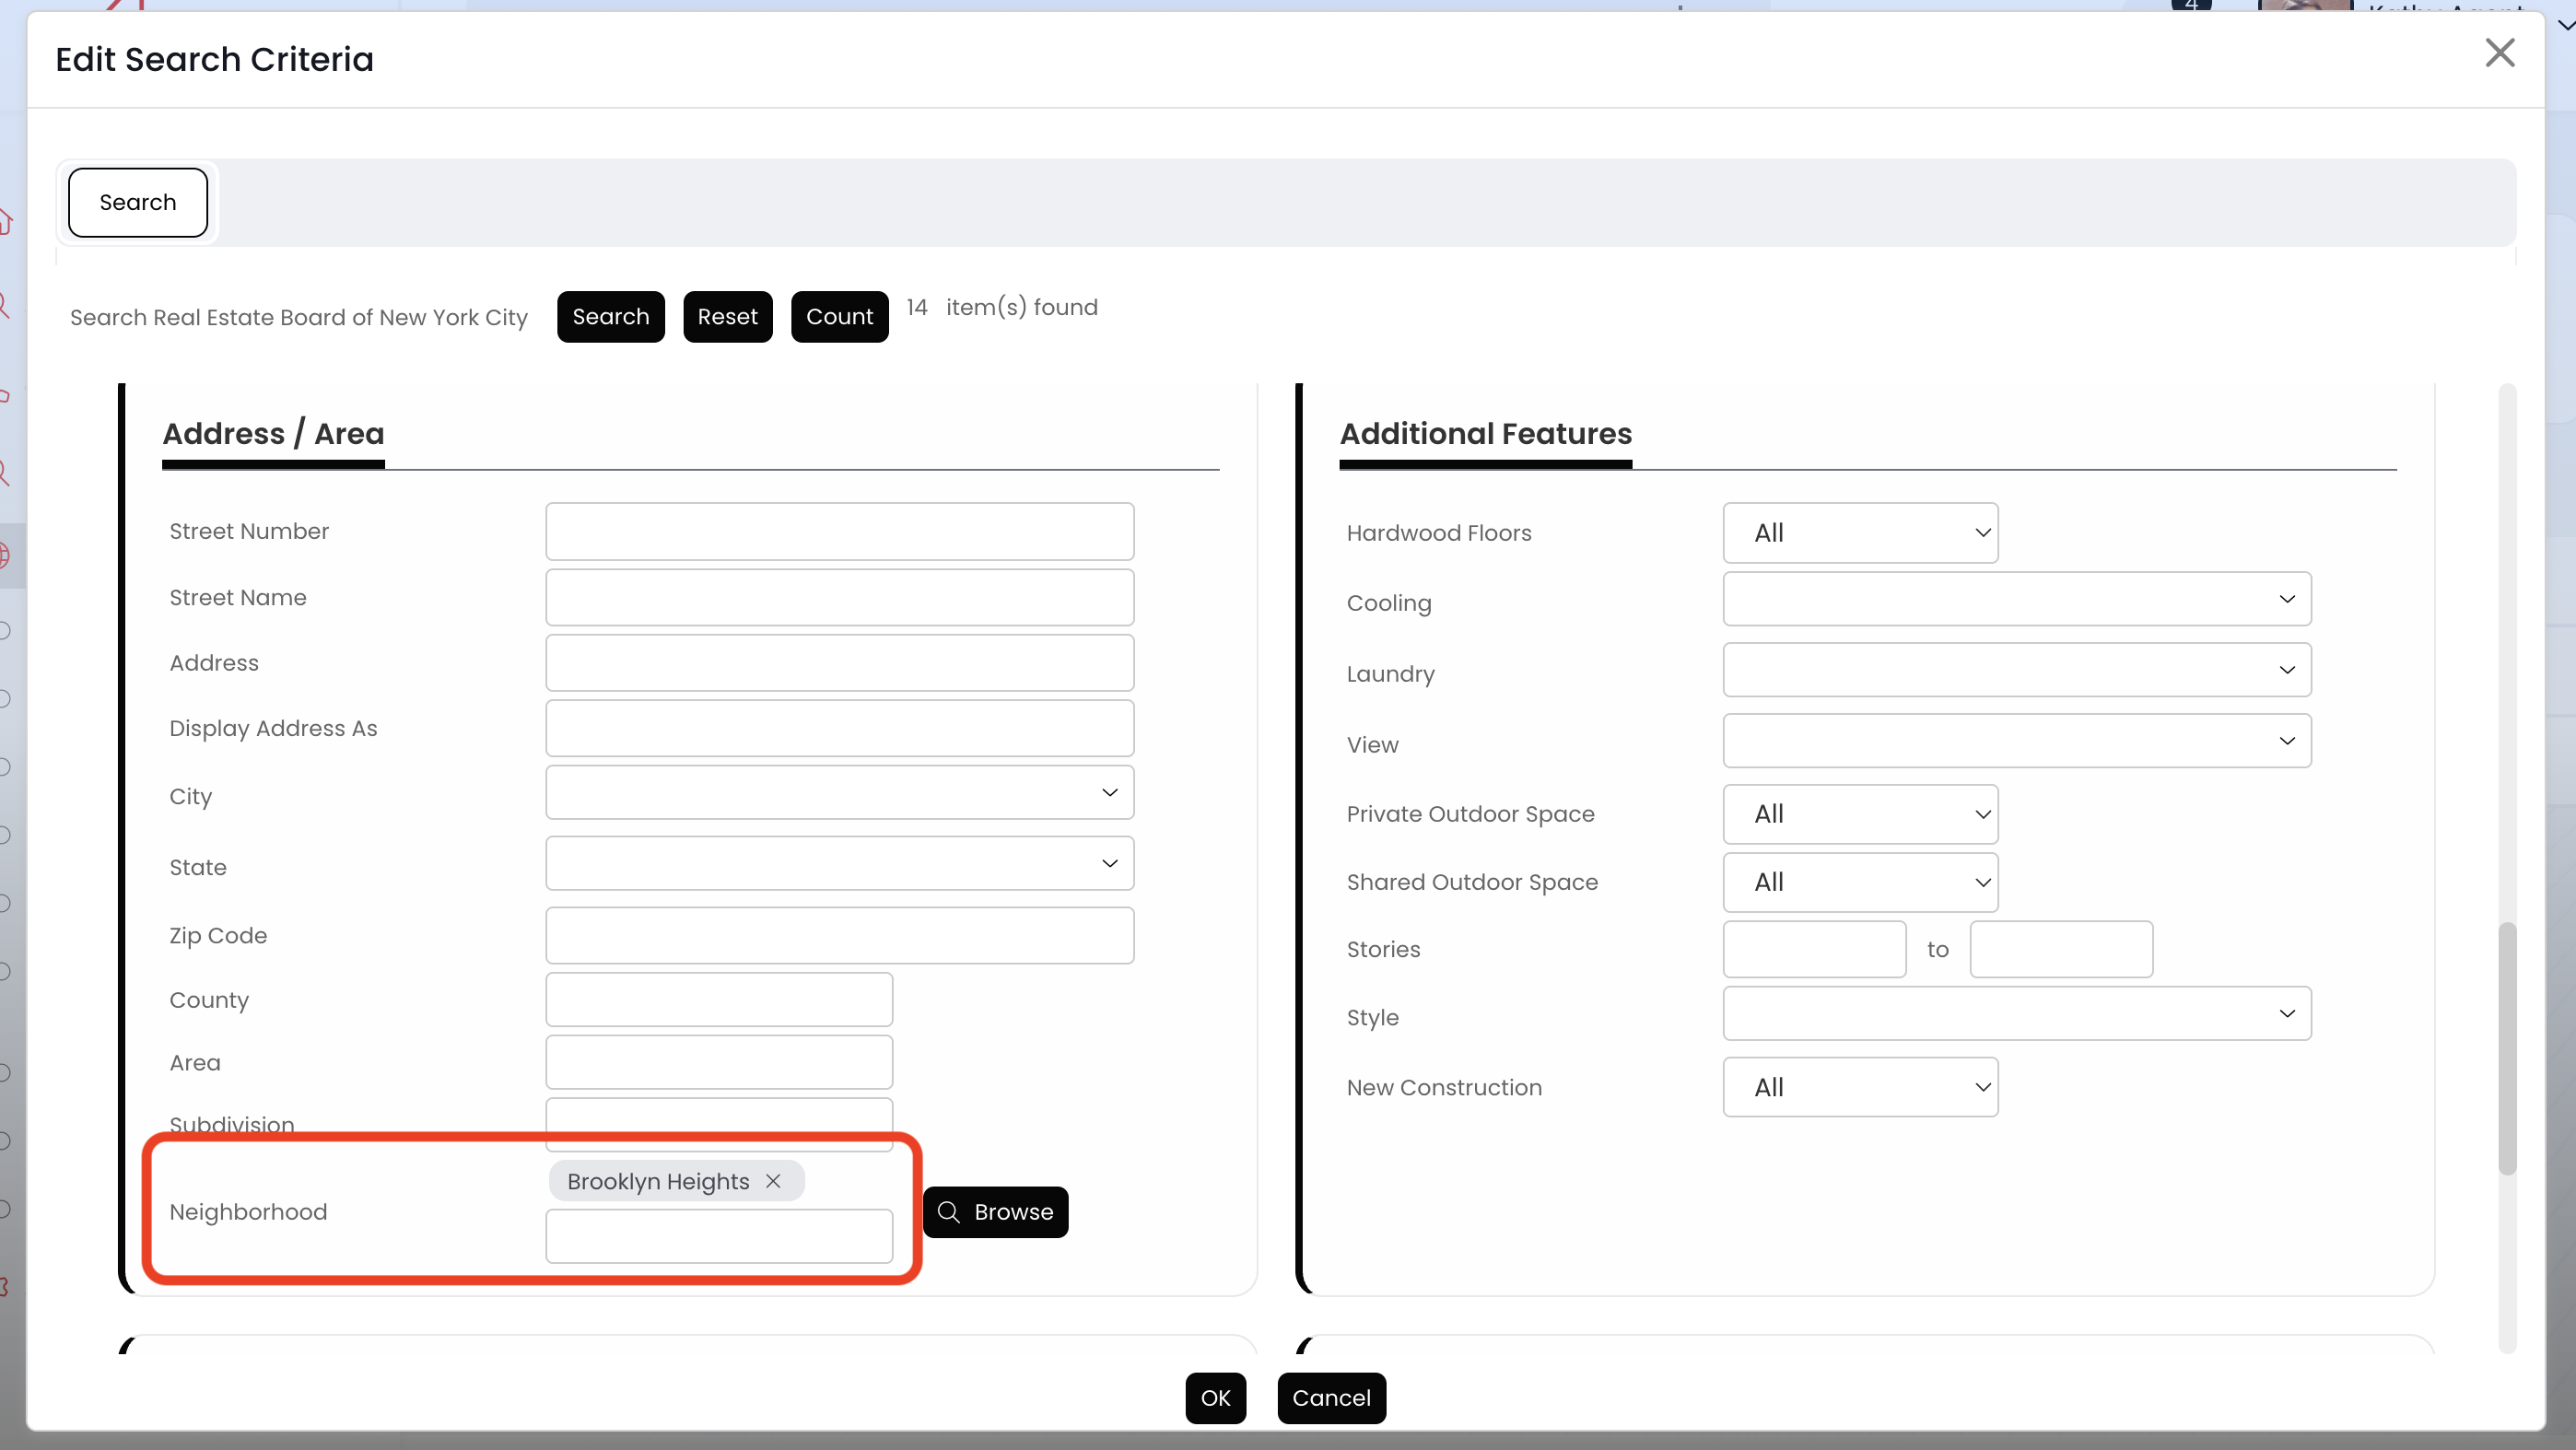
6.) Add the criteria/filters for this report (areas, property types, price, beds, baths, etc.)
- Use the "Neighborhood" field to add your areas/neighborhoods!!!
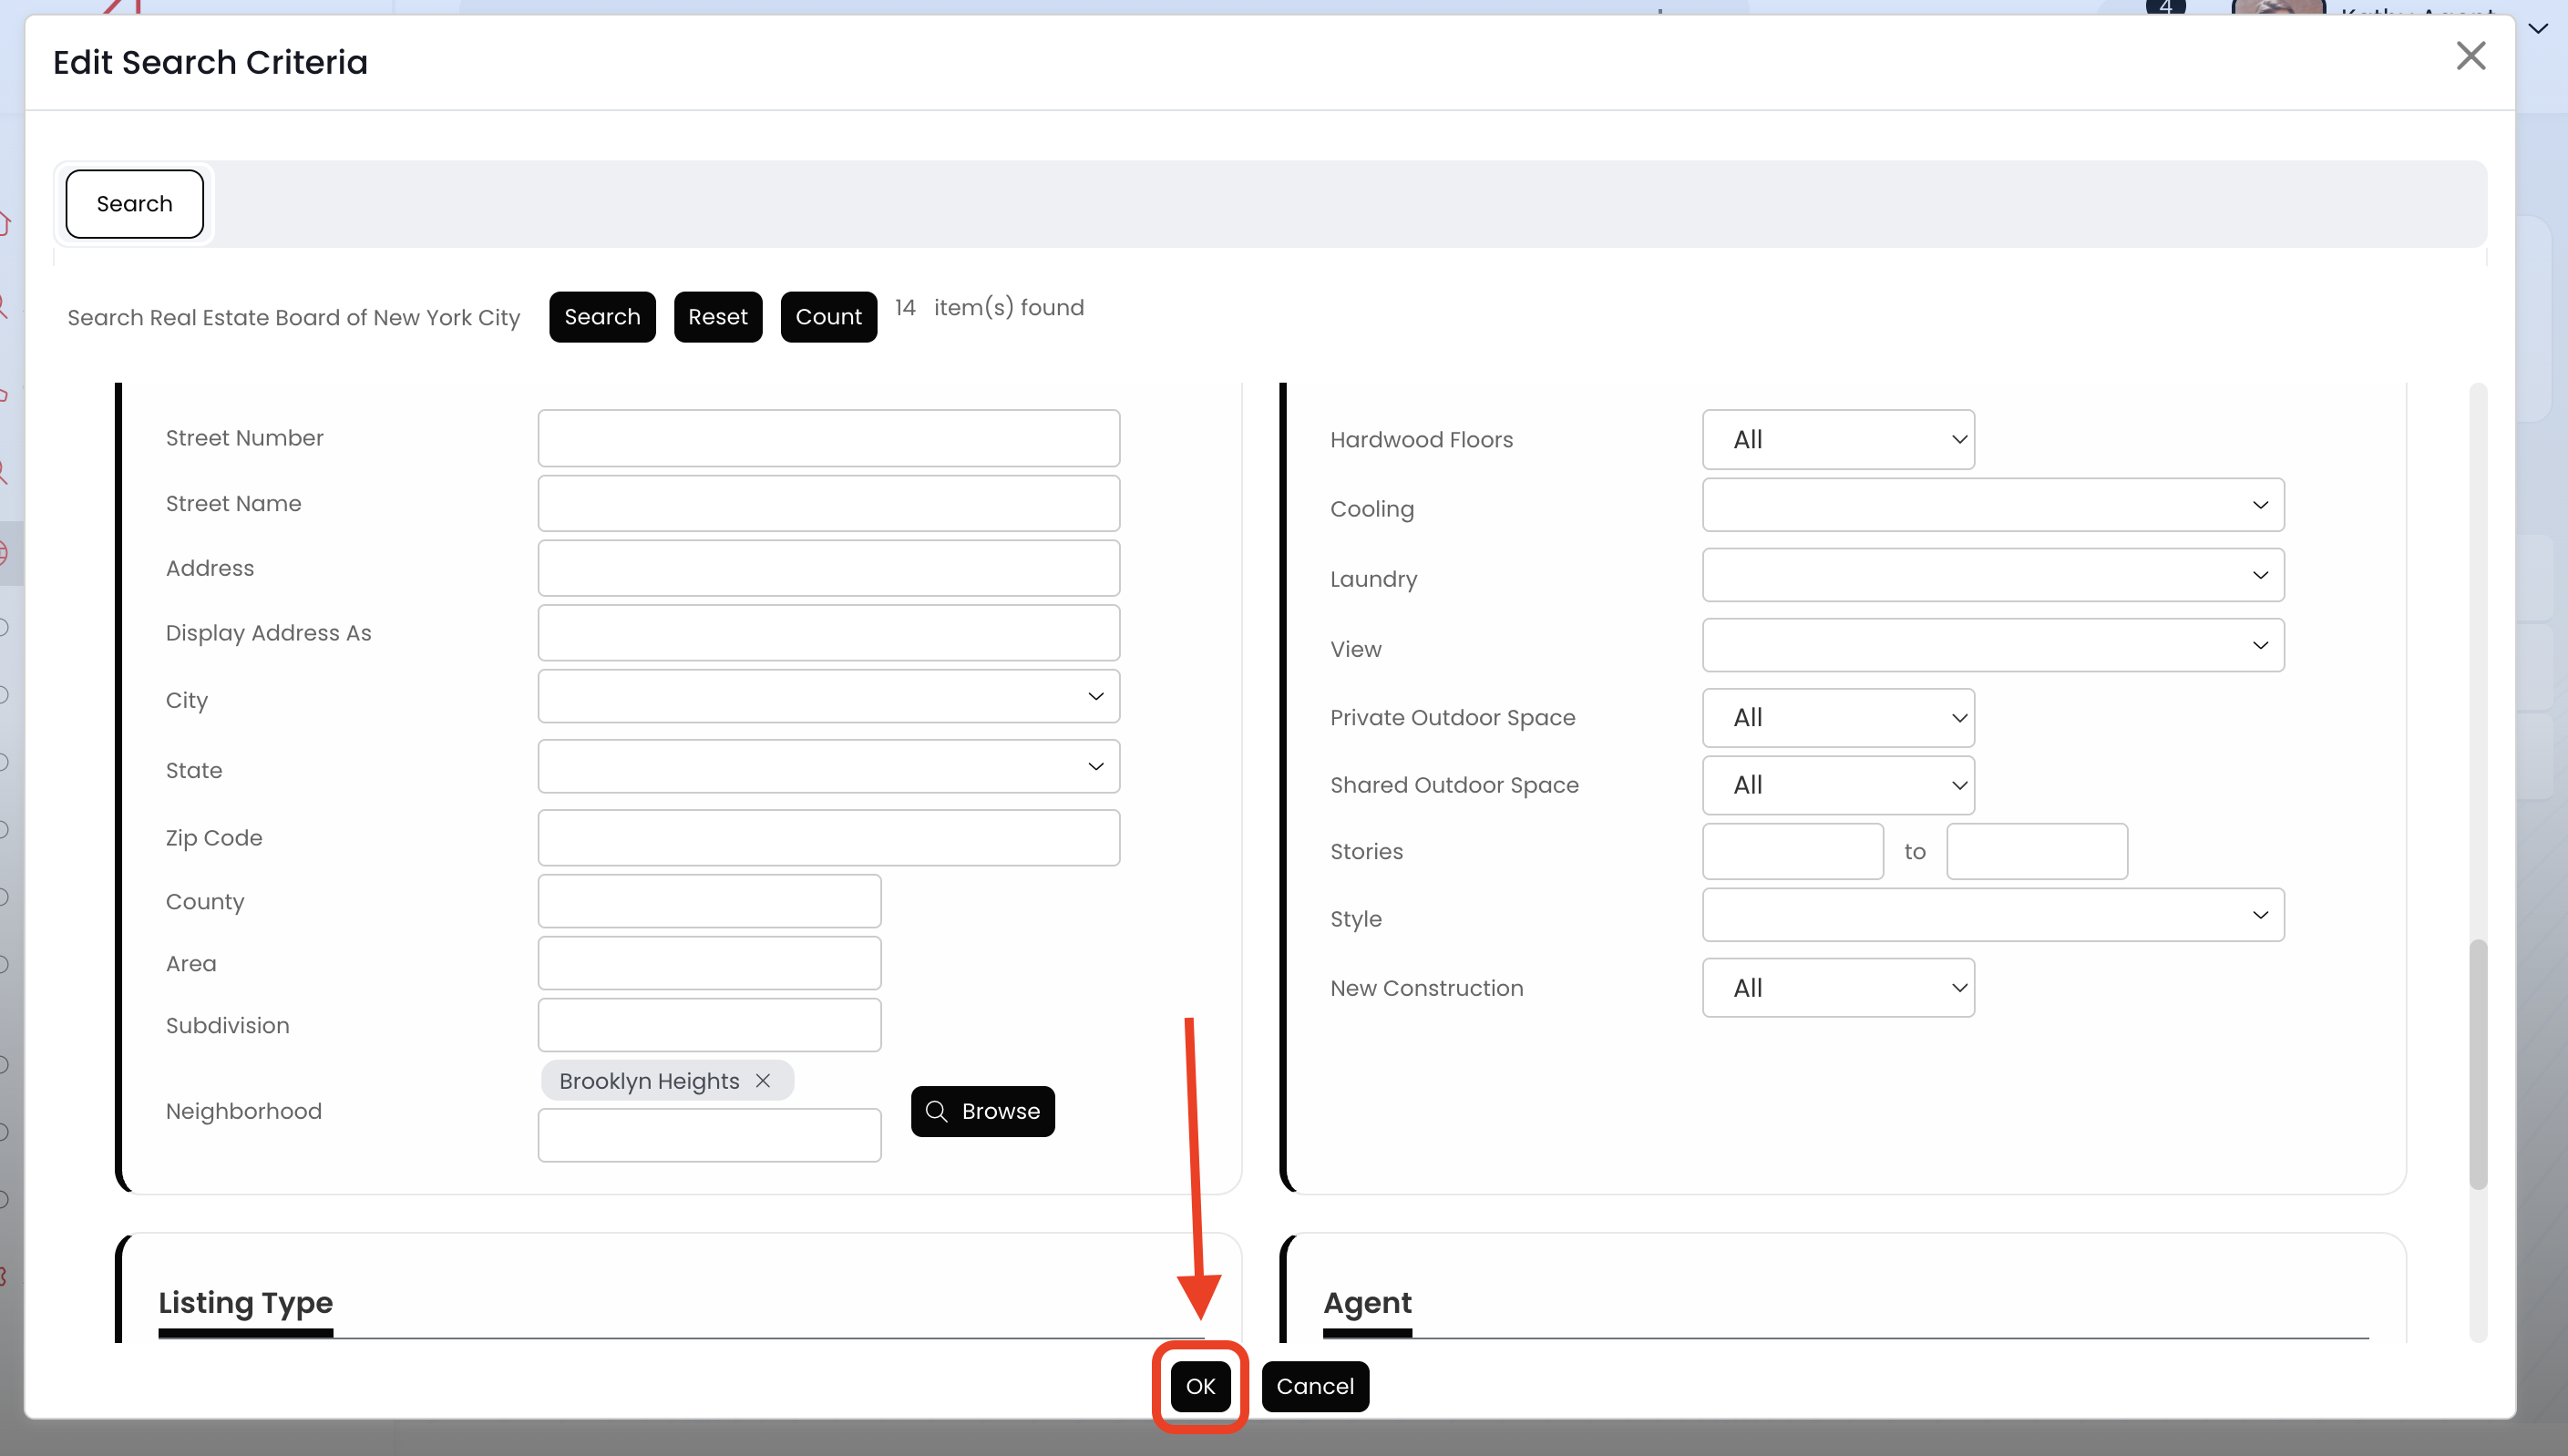
7.) When you're done applying filters/criteria, click the OK button at the bottom
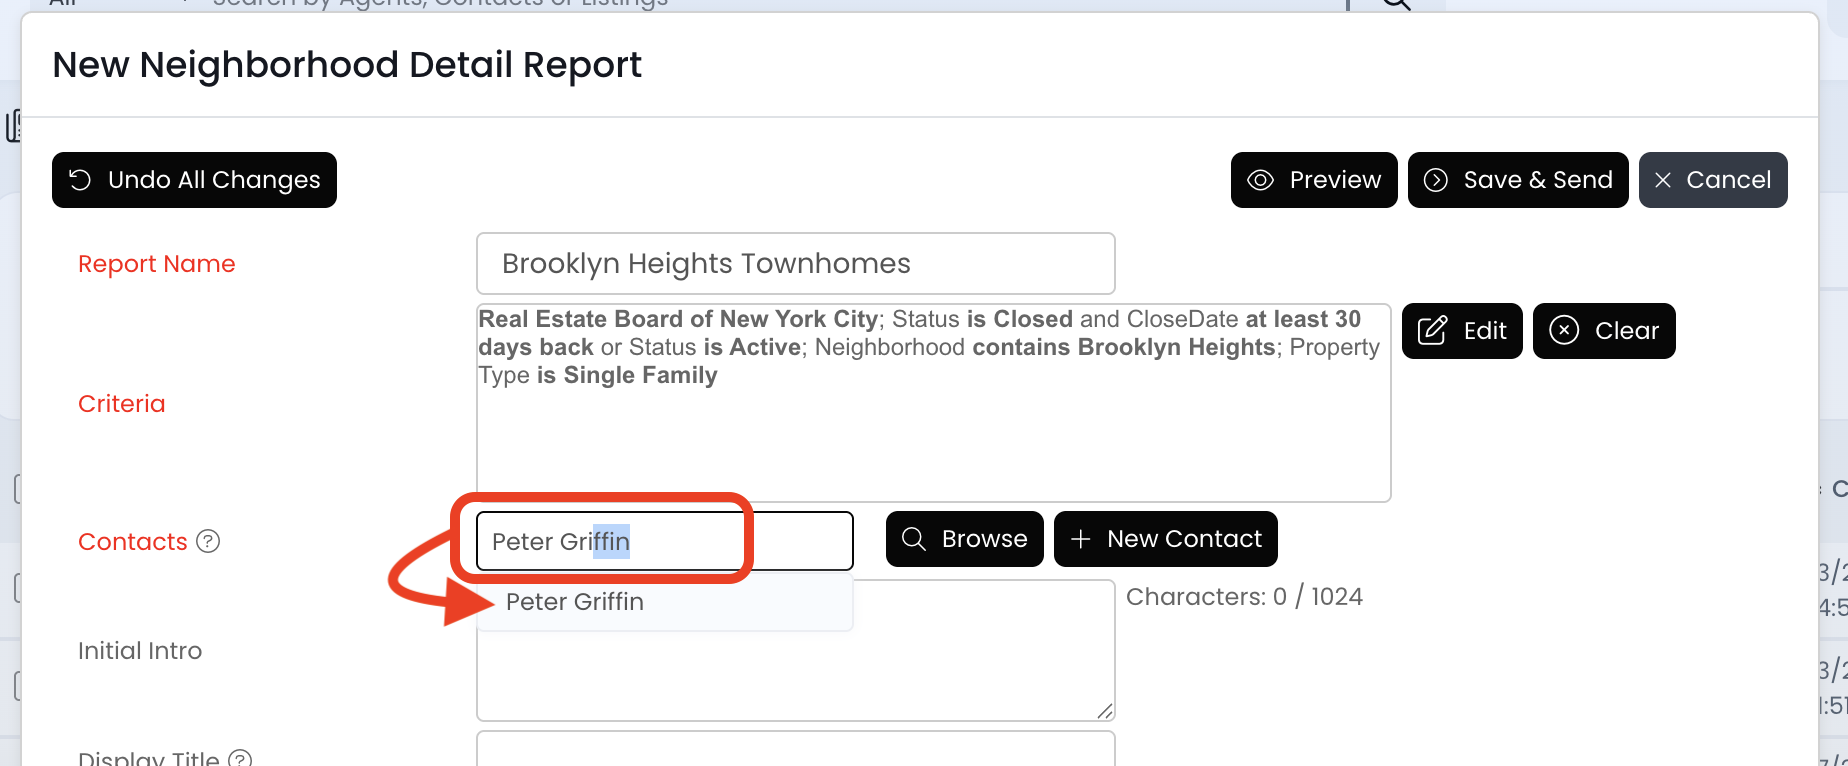
8.) Type the contact's name, and then click on the record that populates underneath to add them.
- Repeat this process if you have more contacts to add - like their spouse, partner, family member, etc.
- Contact not populating? Click on the + New Contact button towards the right to add them now!
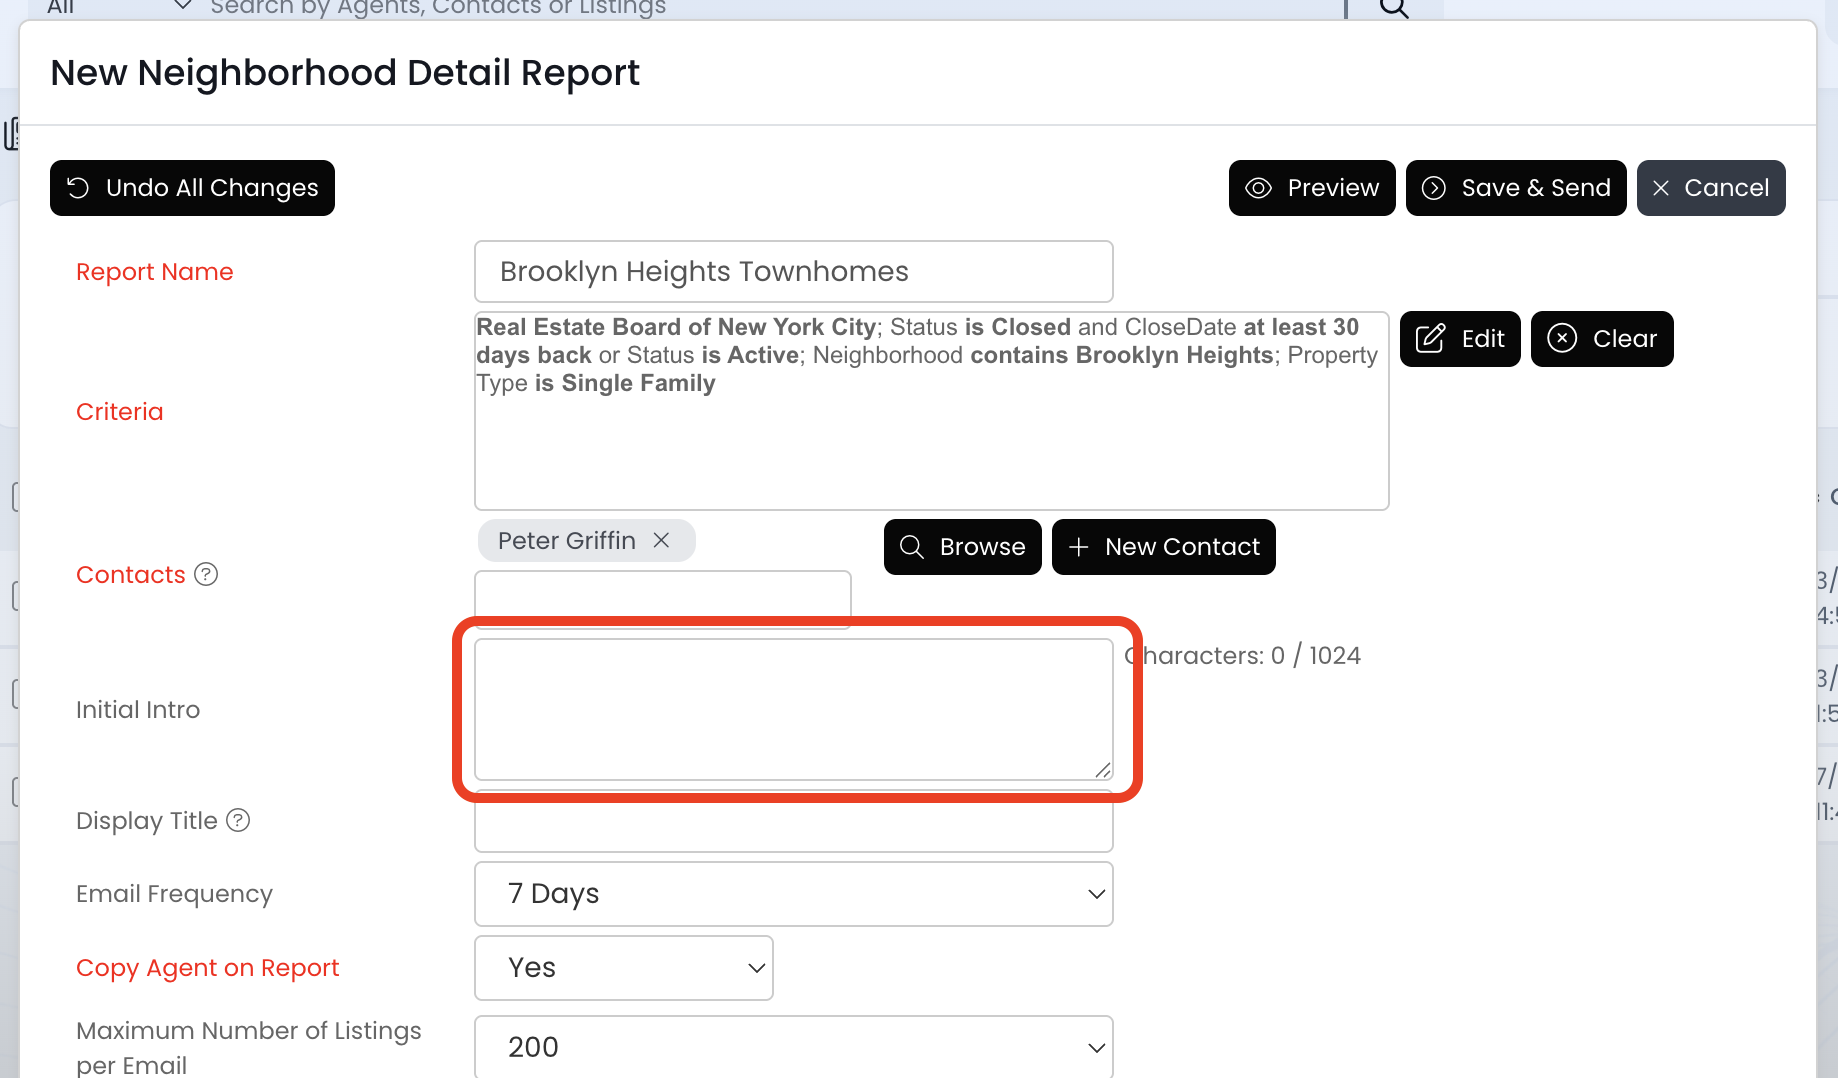
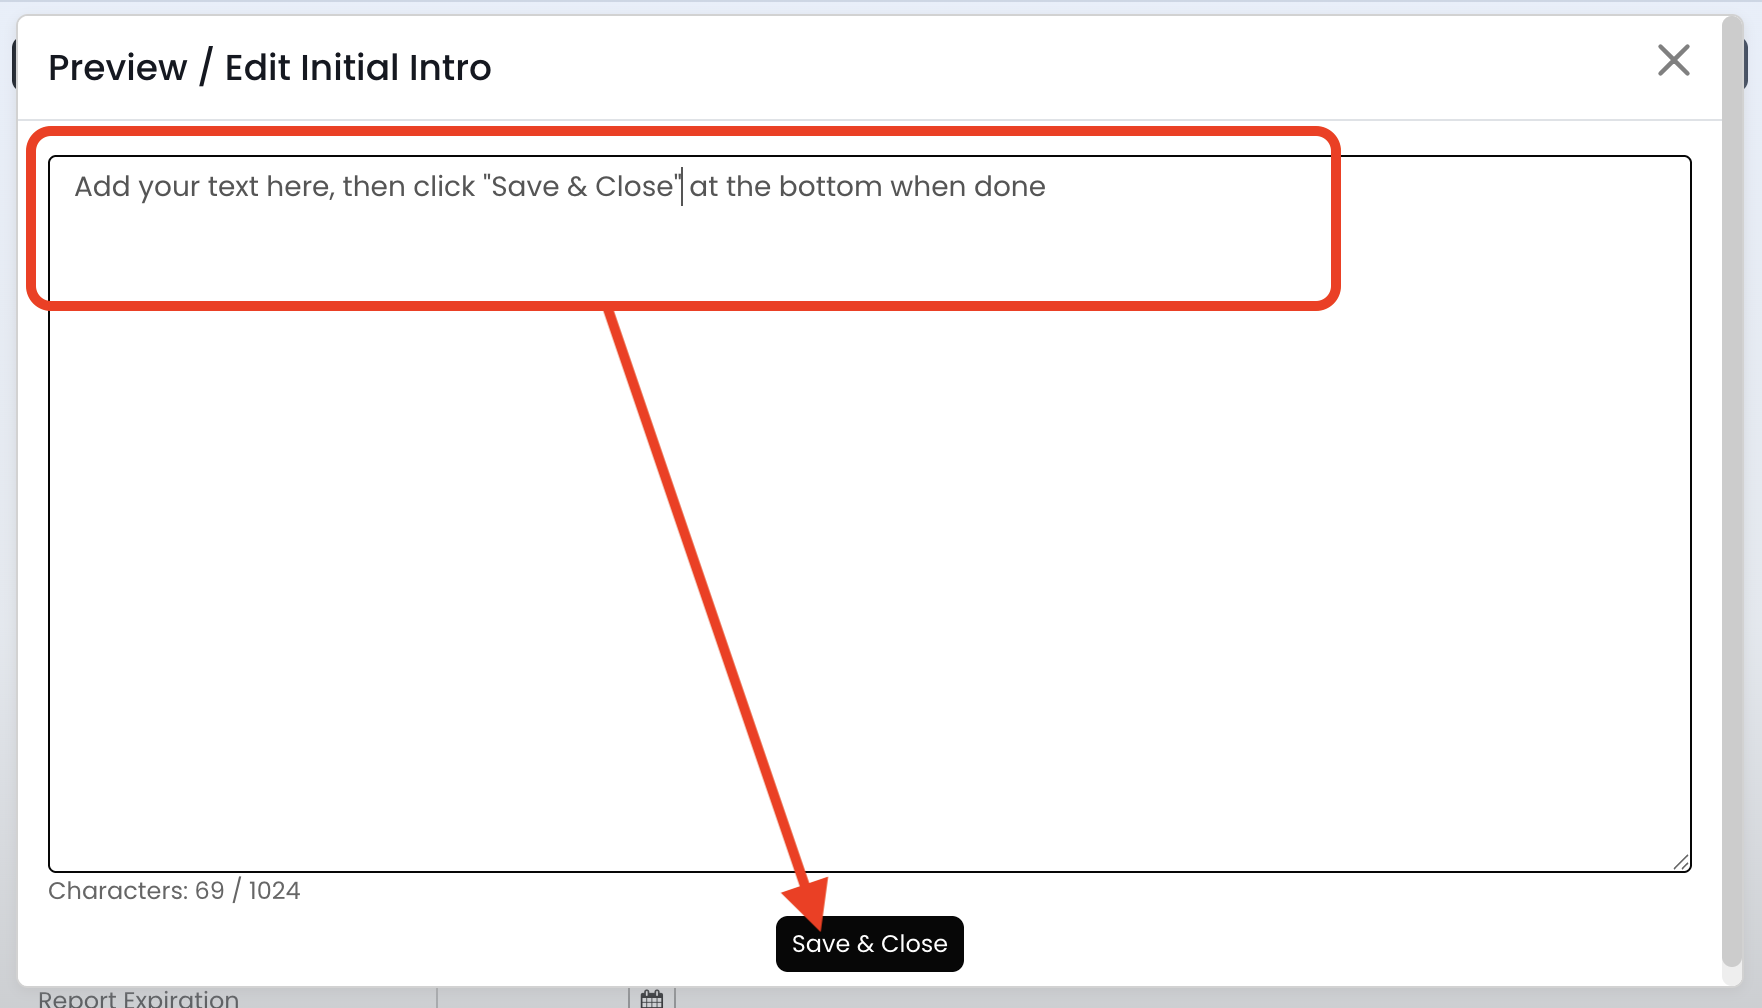
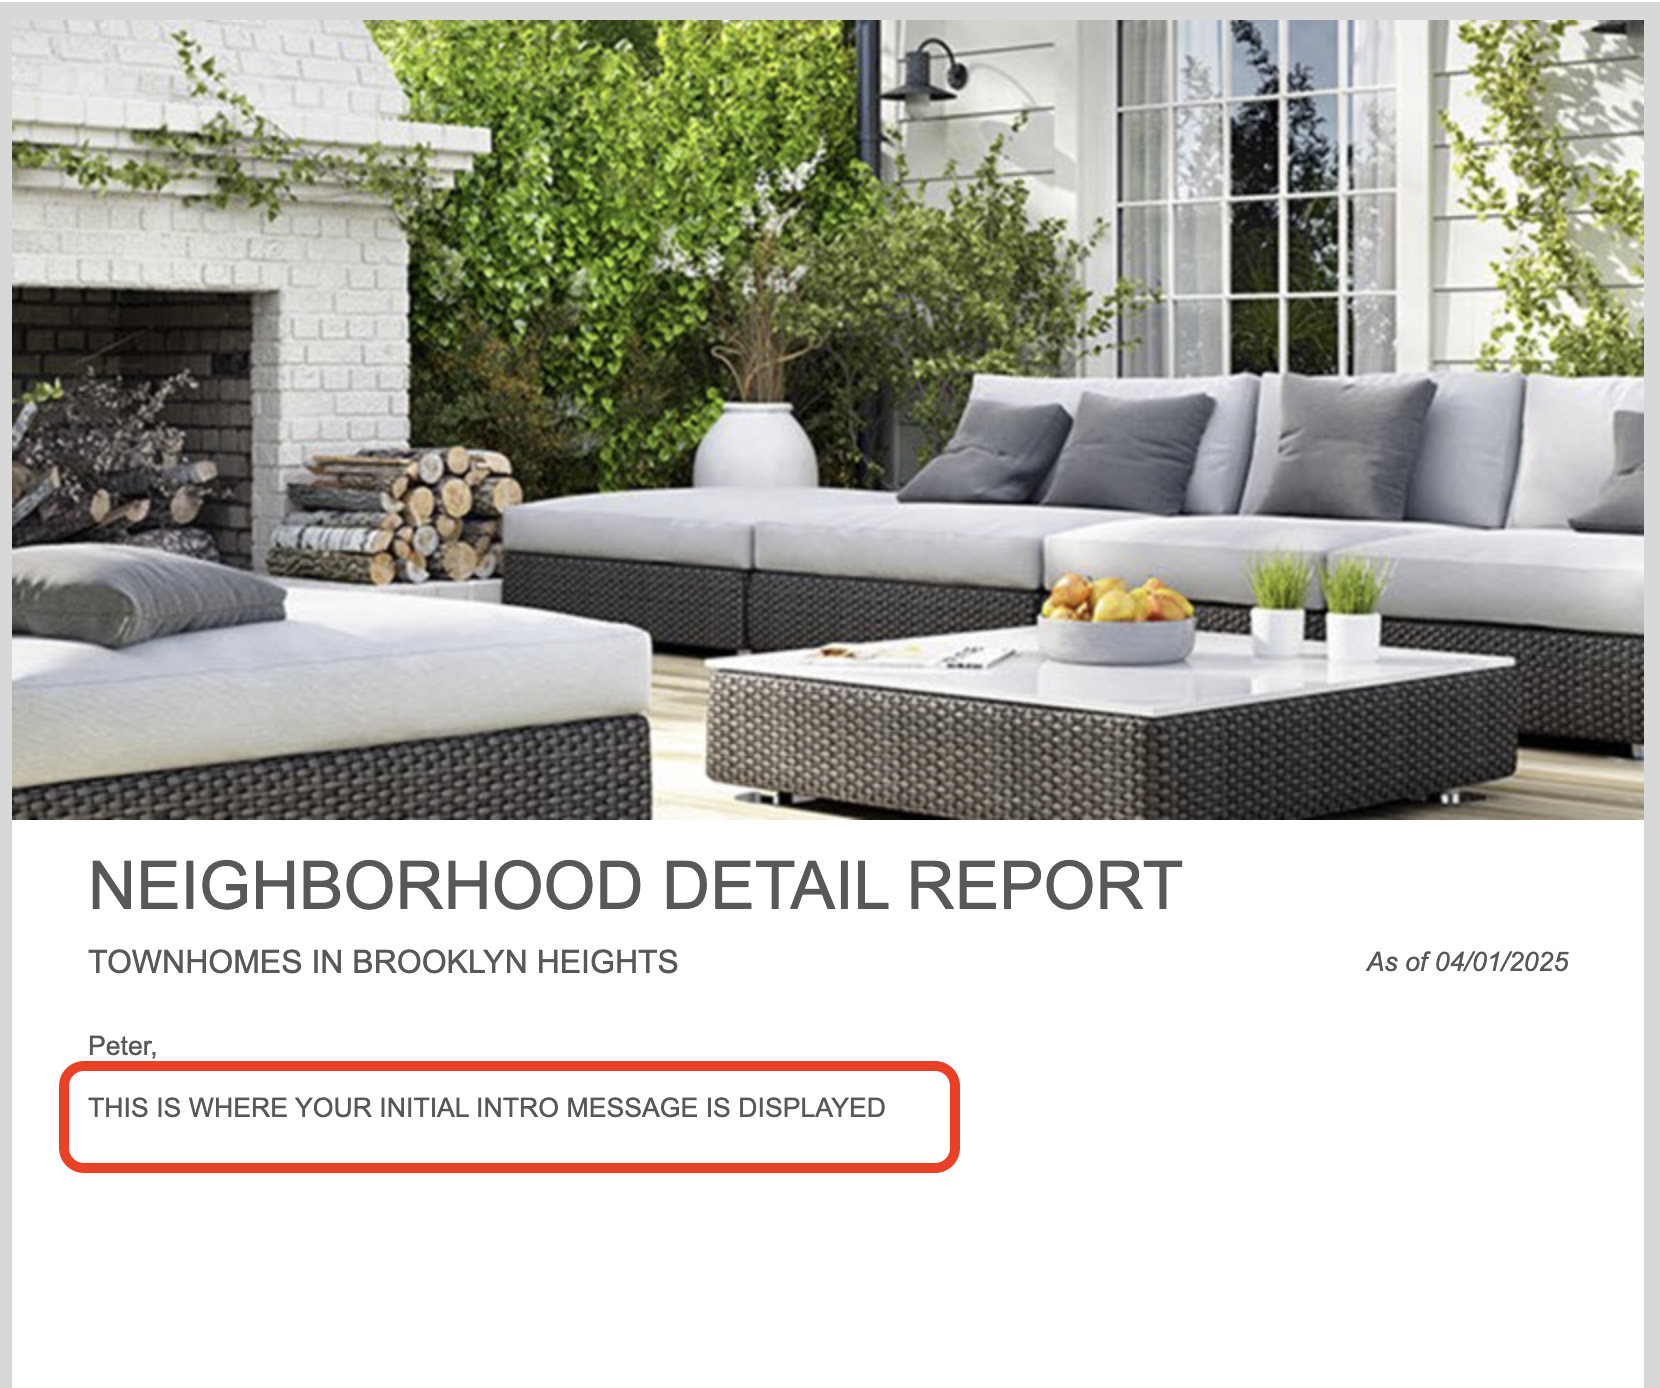
9.) Add a custom message to the very first report emailed by clicking in the "Initial Intro" field. Add your text, and then click on the Save & Close button.
- THIS IS OPTIONAL - SKIP THIS STEP IF YOU'RE NOT INTERESTED
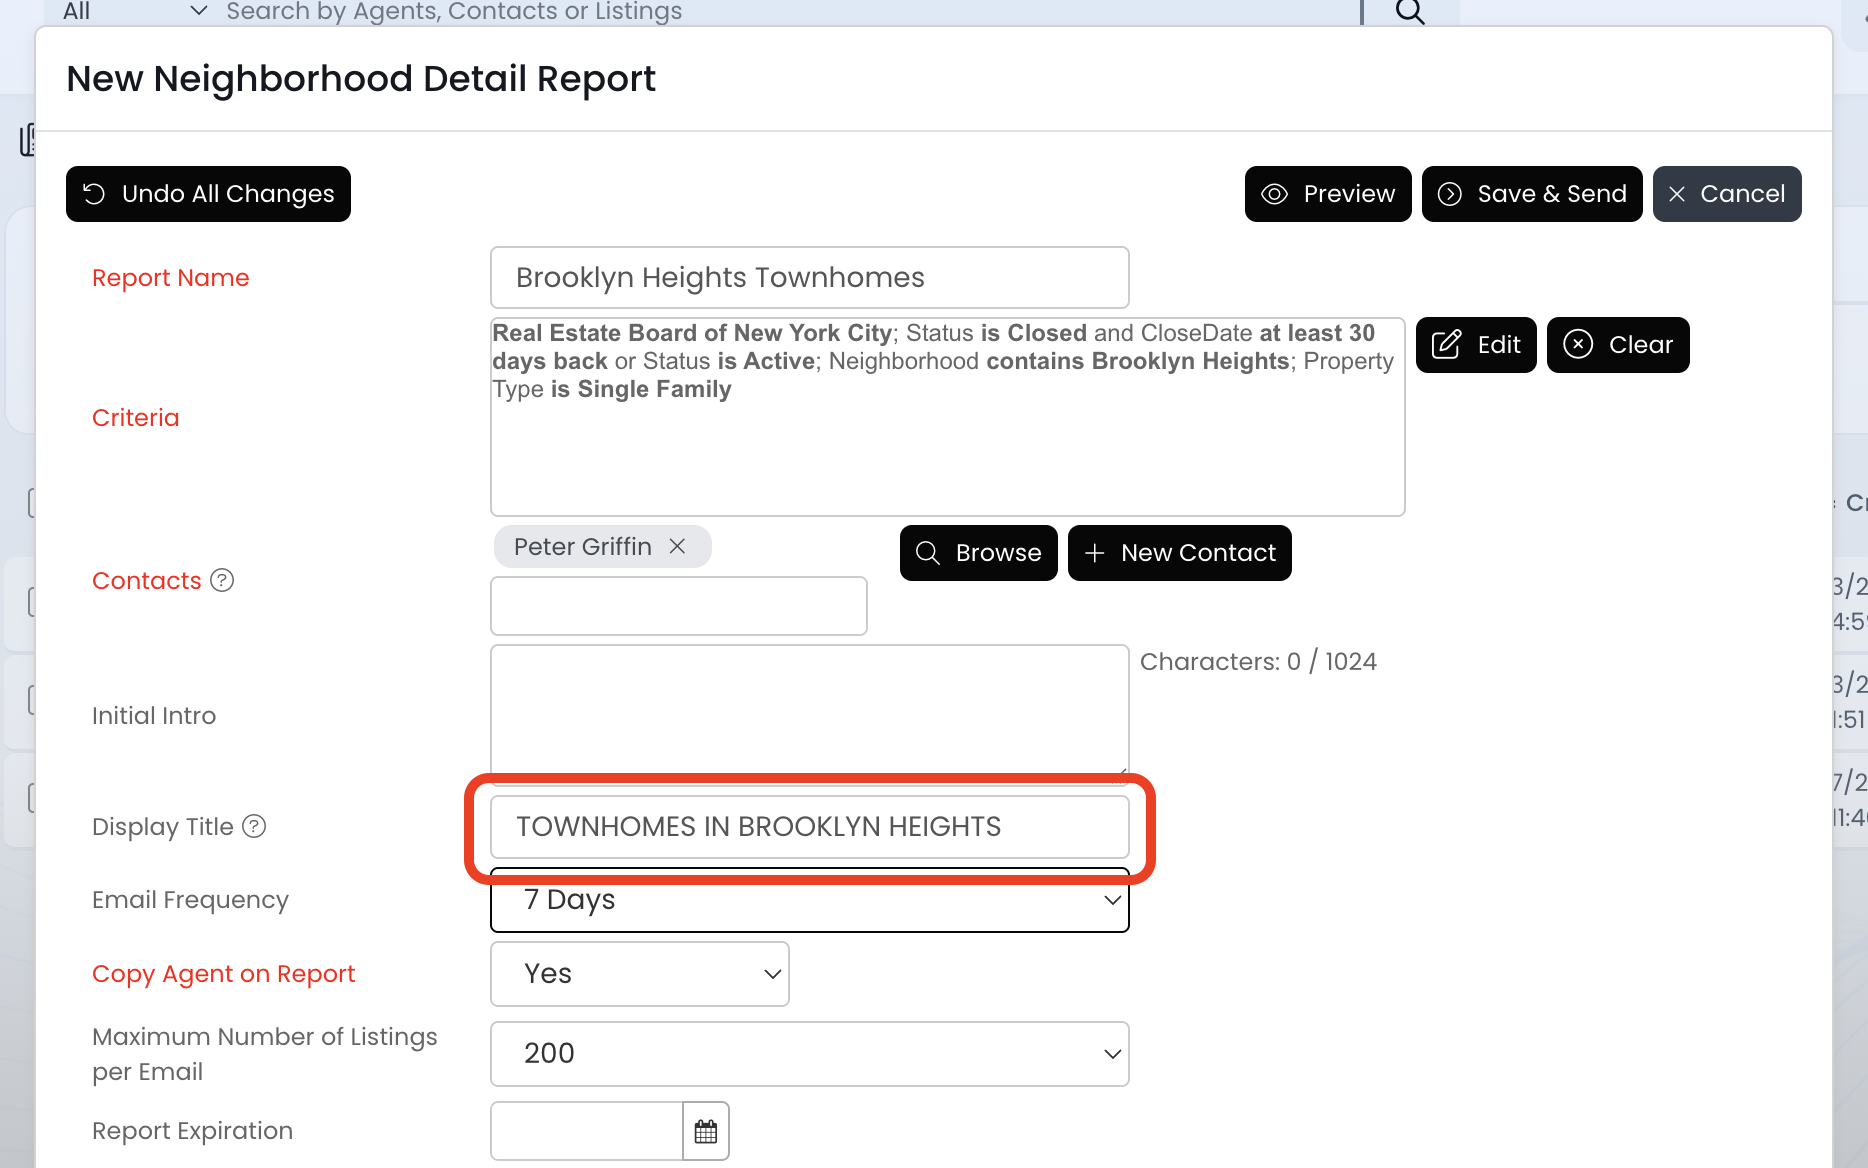
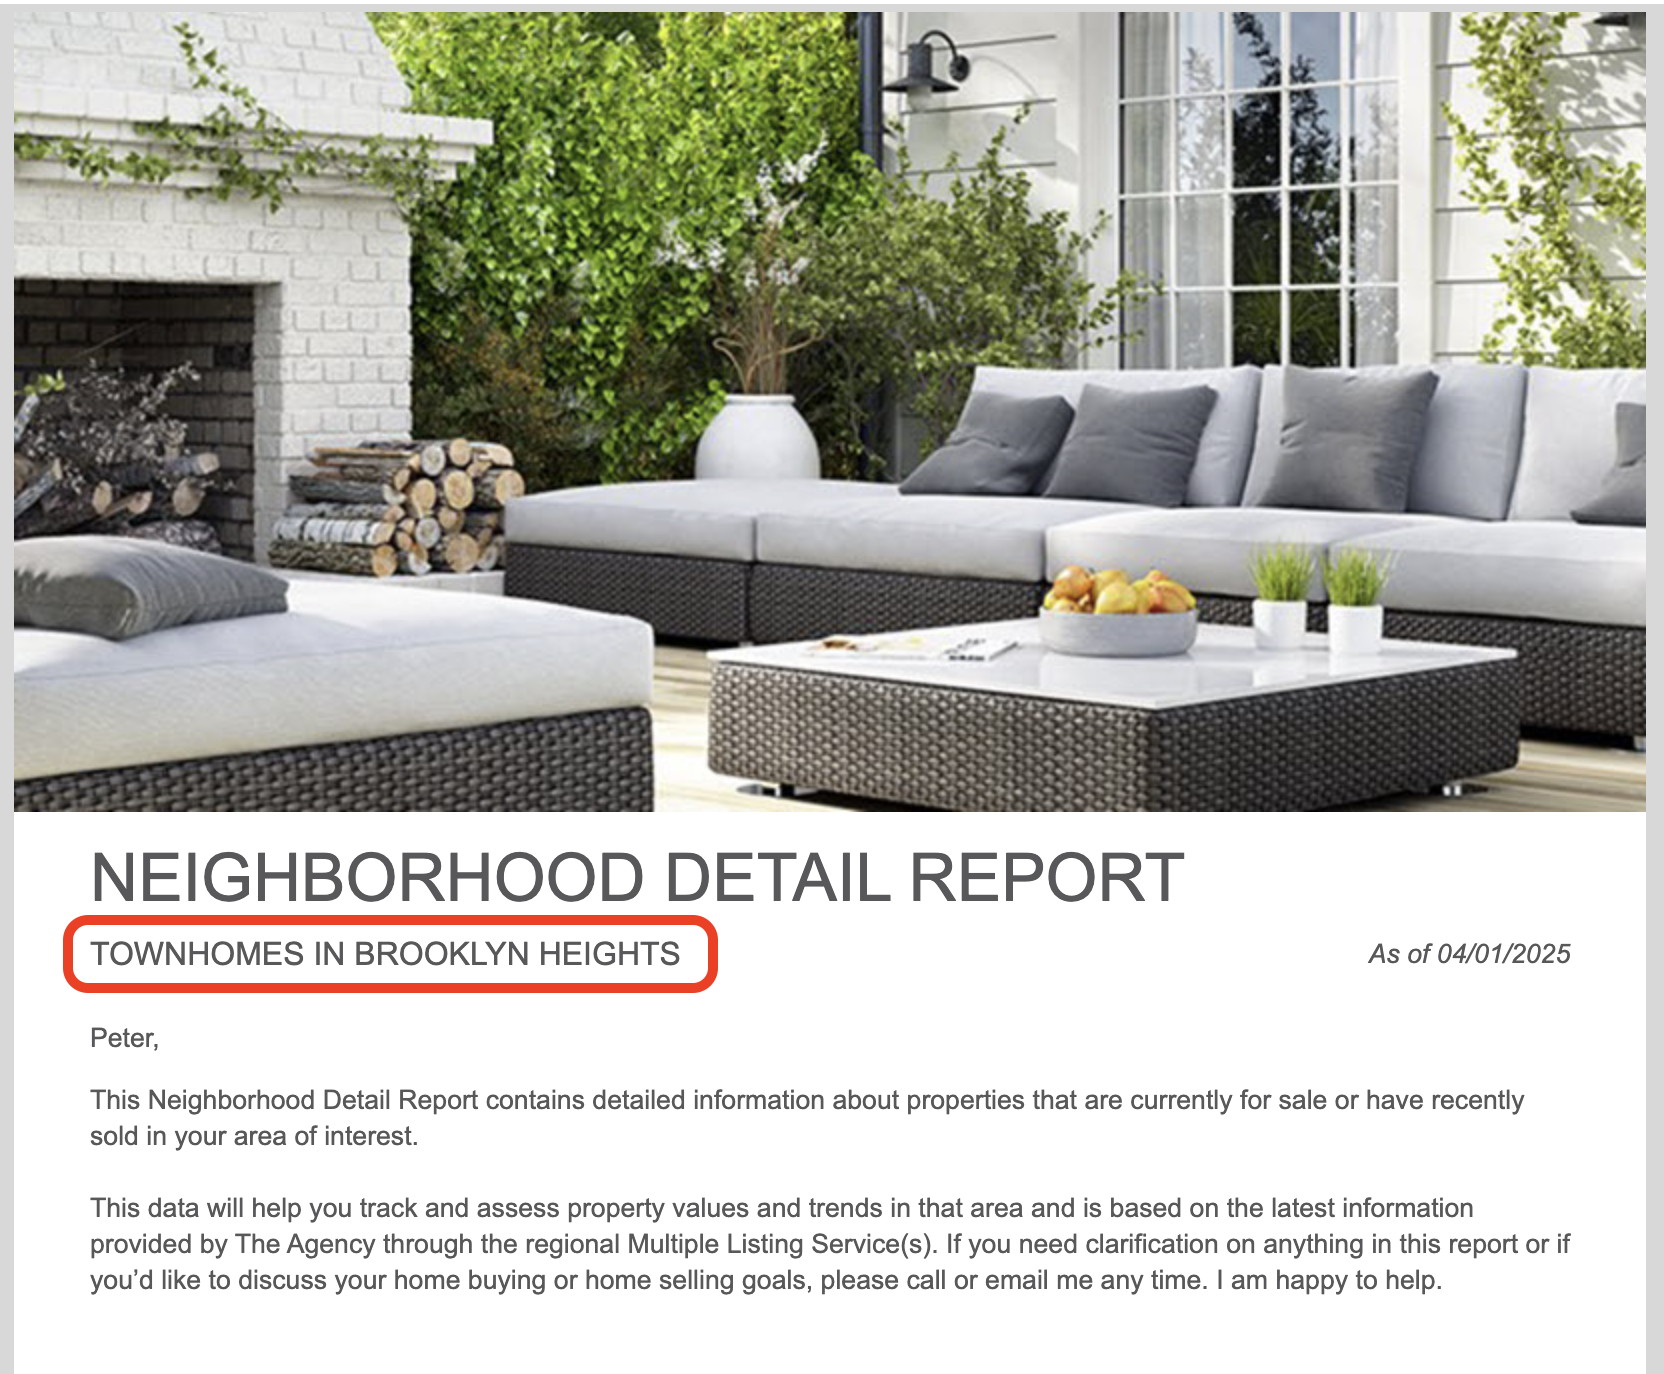
10.) Add a title to the top of the report by using the "Display Title" field.
- THIS IS OPTIONAL - SKIP THIS STEP IF YOU'RE NOT INTERESTED
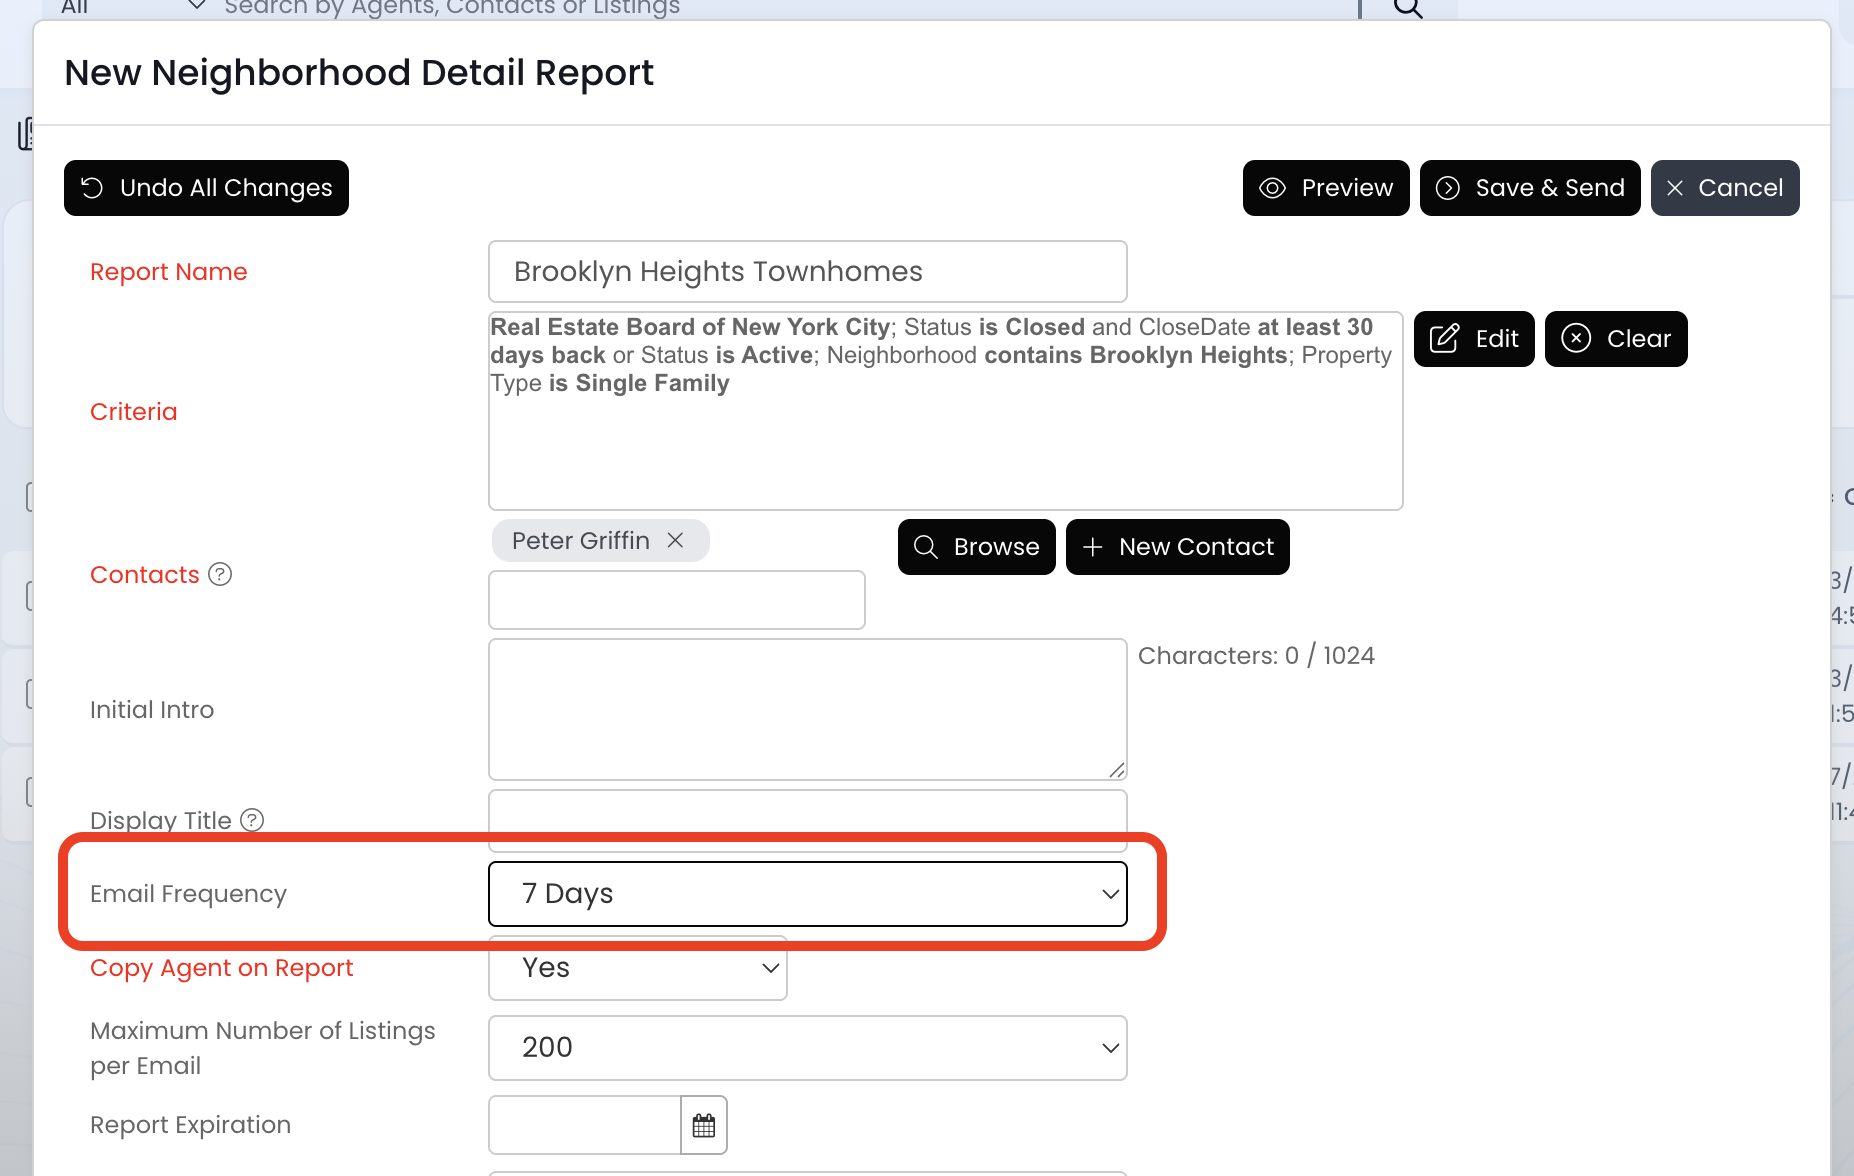
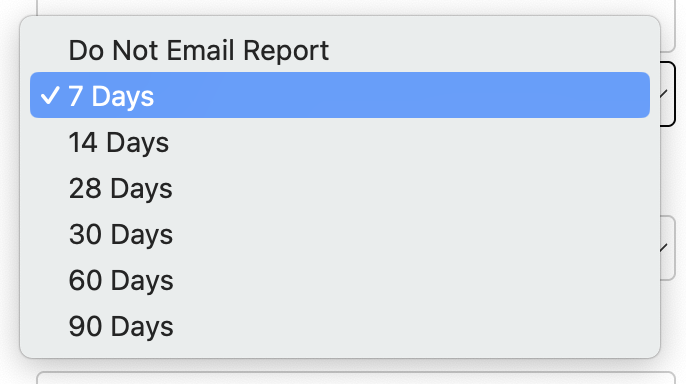
11.) Review the "Email Frequency" field and make any necessary changes. This field controls the contact's email notifications and always defaults to 7 days.
-
YES: Select the 7 days, 14 days, 28 days, 30 days, 60 days, or 90 days option
-
NO: Select the Do Not Email Report option
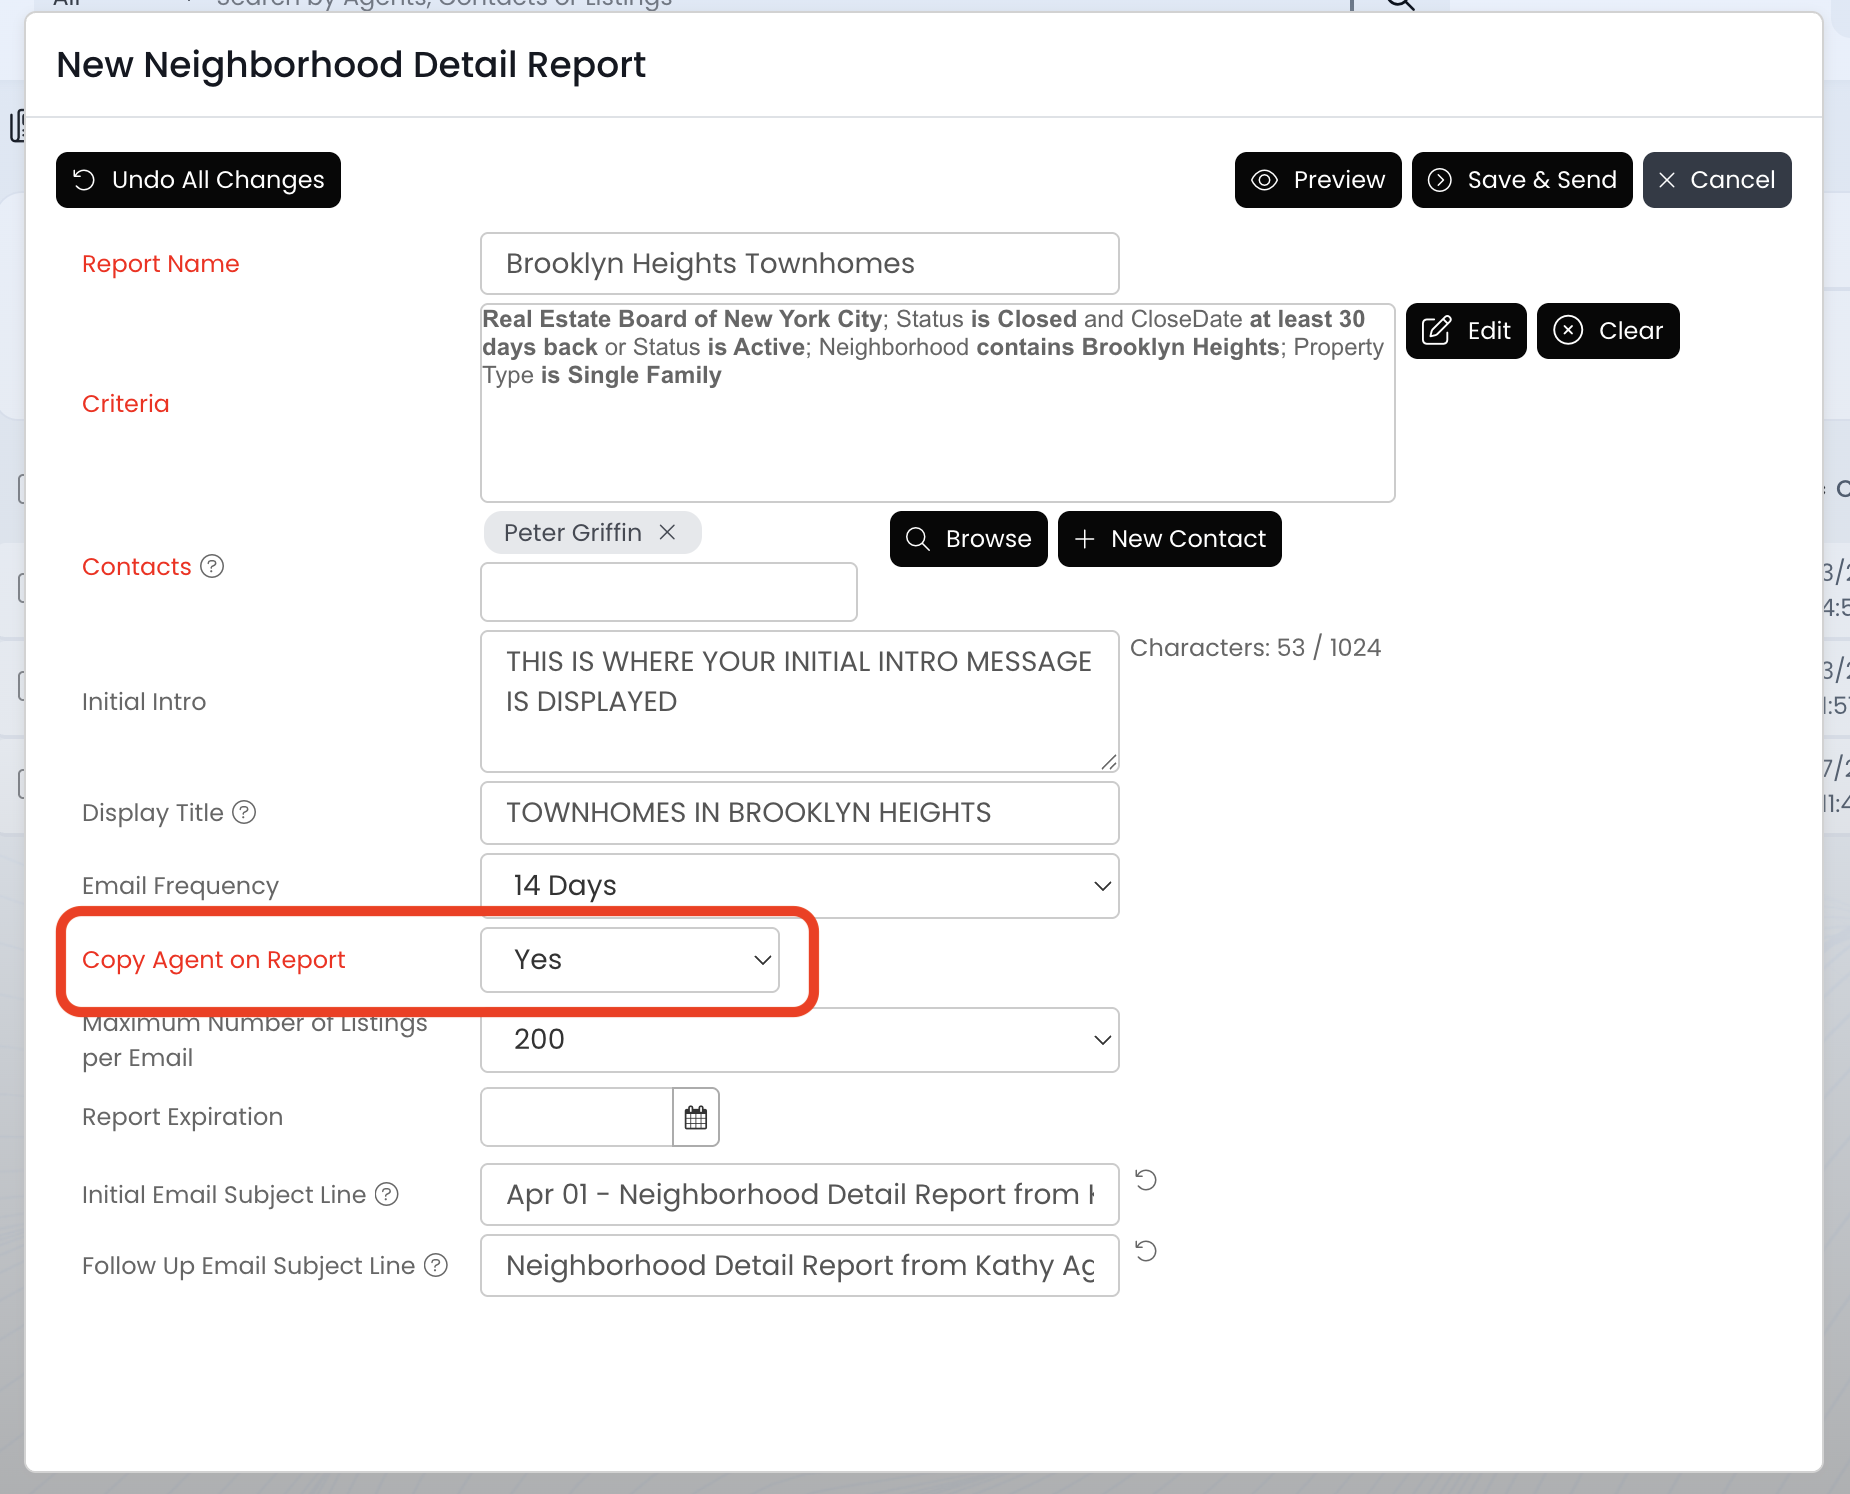
12.) Review the Copy Agent on Report field and make any necessary changes. This field controls your email notifications and always defaults to YES.
- YES: You will receive the market reports by email
- NO: You will not receive the market reports by email
13.) Add a custom subject line to the first email using the "Initial Email Subject Line" field.
- THIS IS OPTIONAL - SKIP THIS STEP IF YOU'RE NOT INTERESTED
- This subject line will only be included on the first email - all other emails after will have the "Follow Up Email Subject Line"

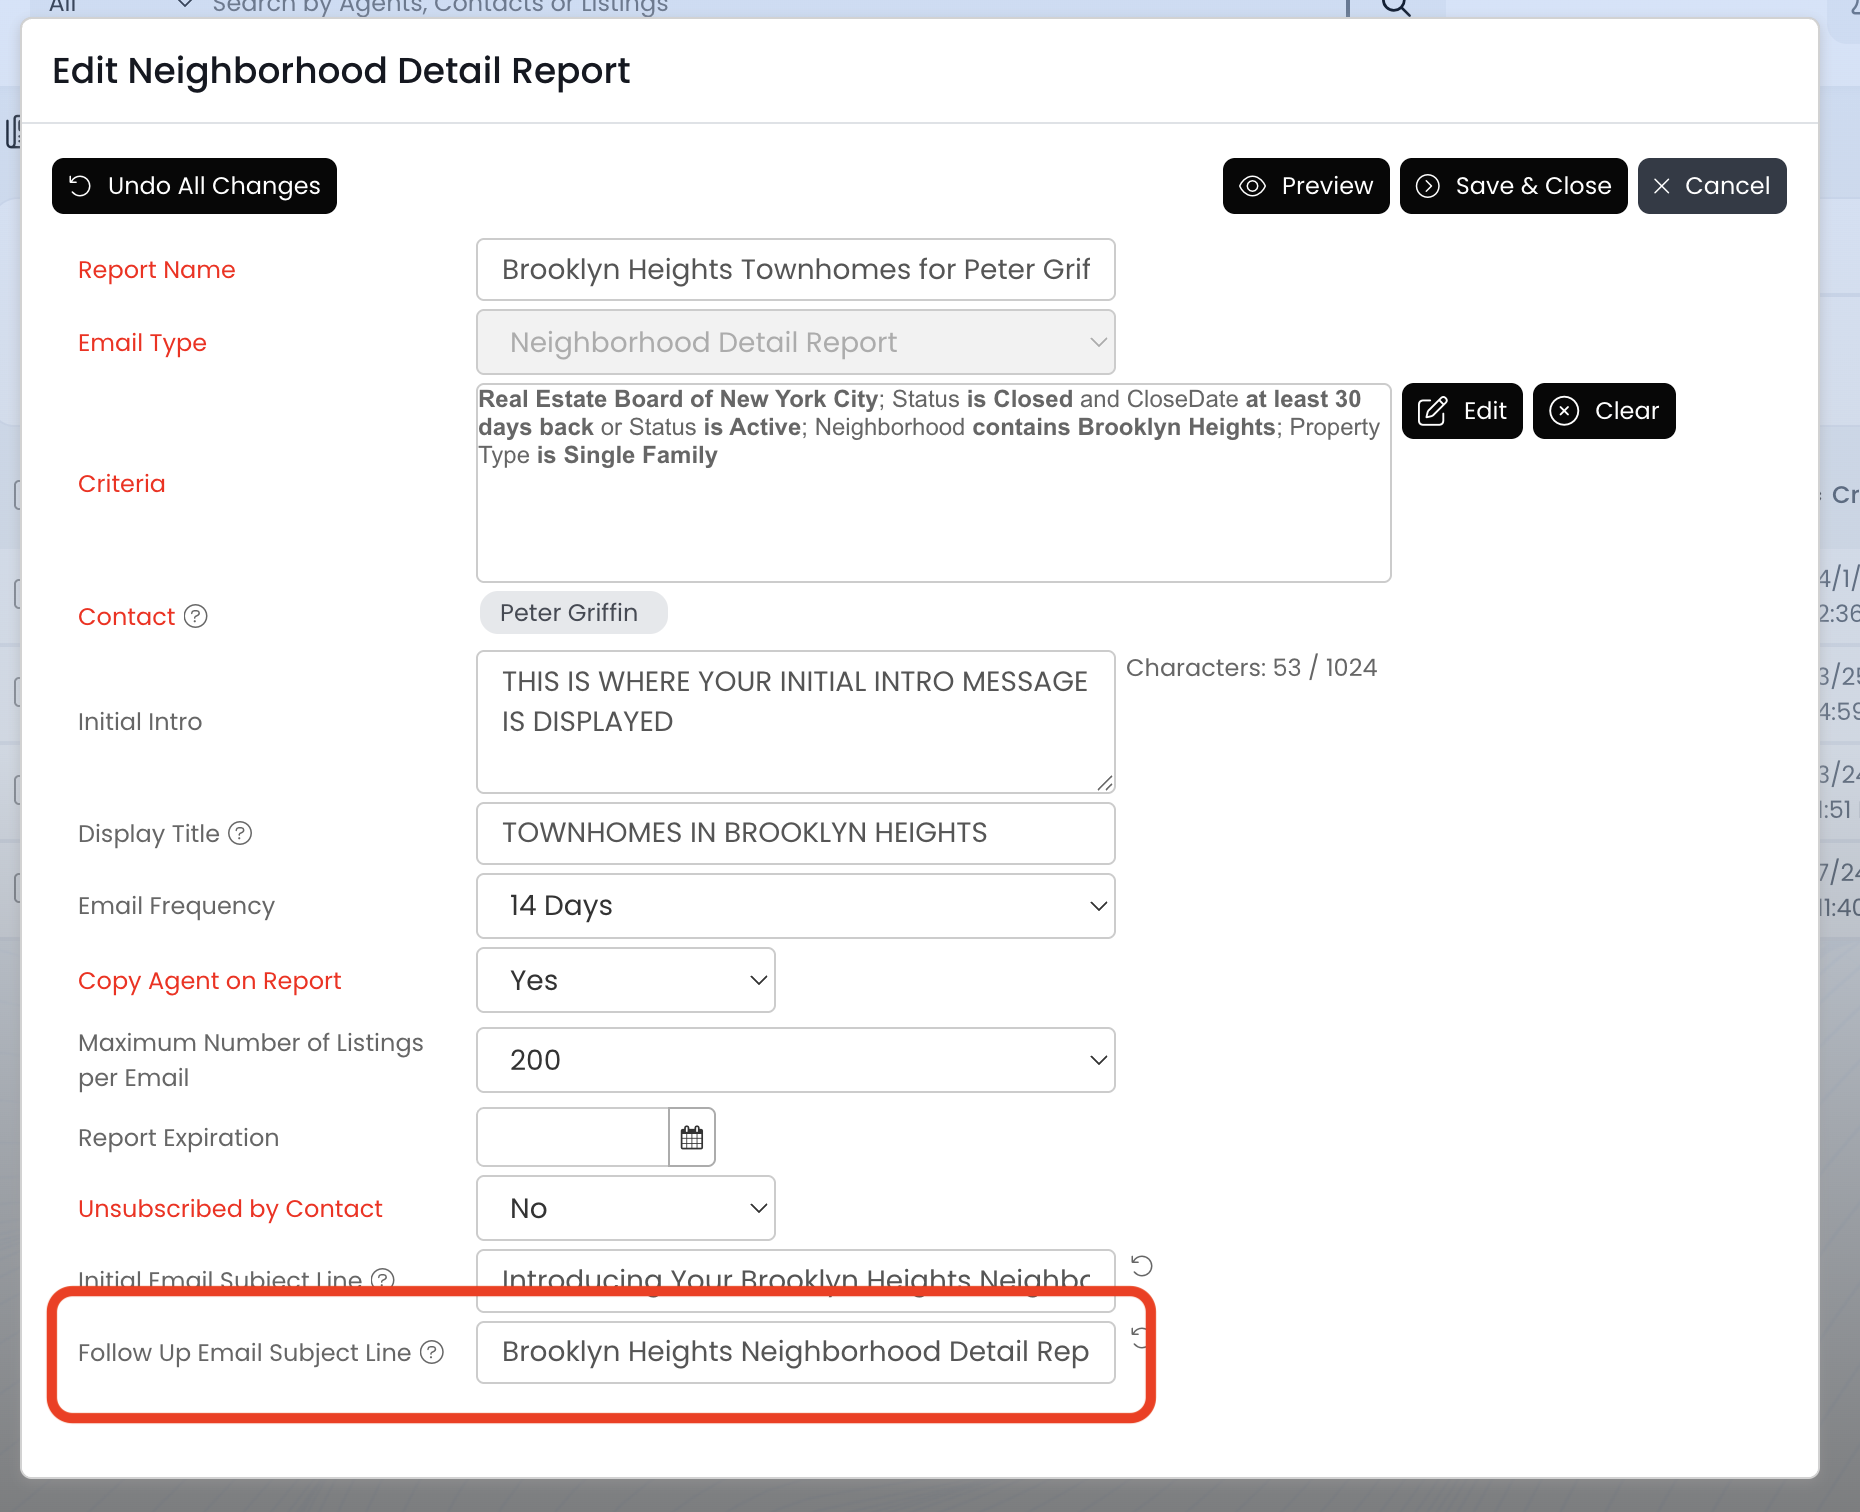
14.) Add a custom subject line to all follow-up emails using the "Follow Up Email Subject Line" field
- THIS IS OPTIONAL - SKIP THIS STEP IF YOU'RE NOT INTERESTED
- This subject line will not be used for the first email - only the second email and moving forward.
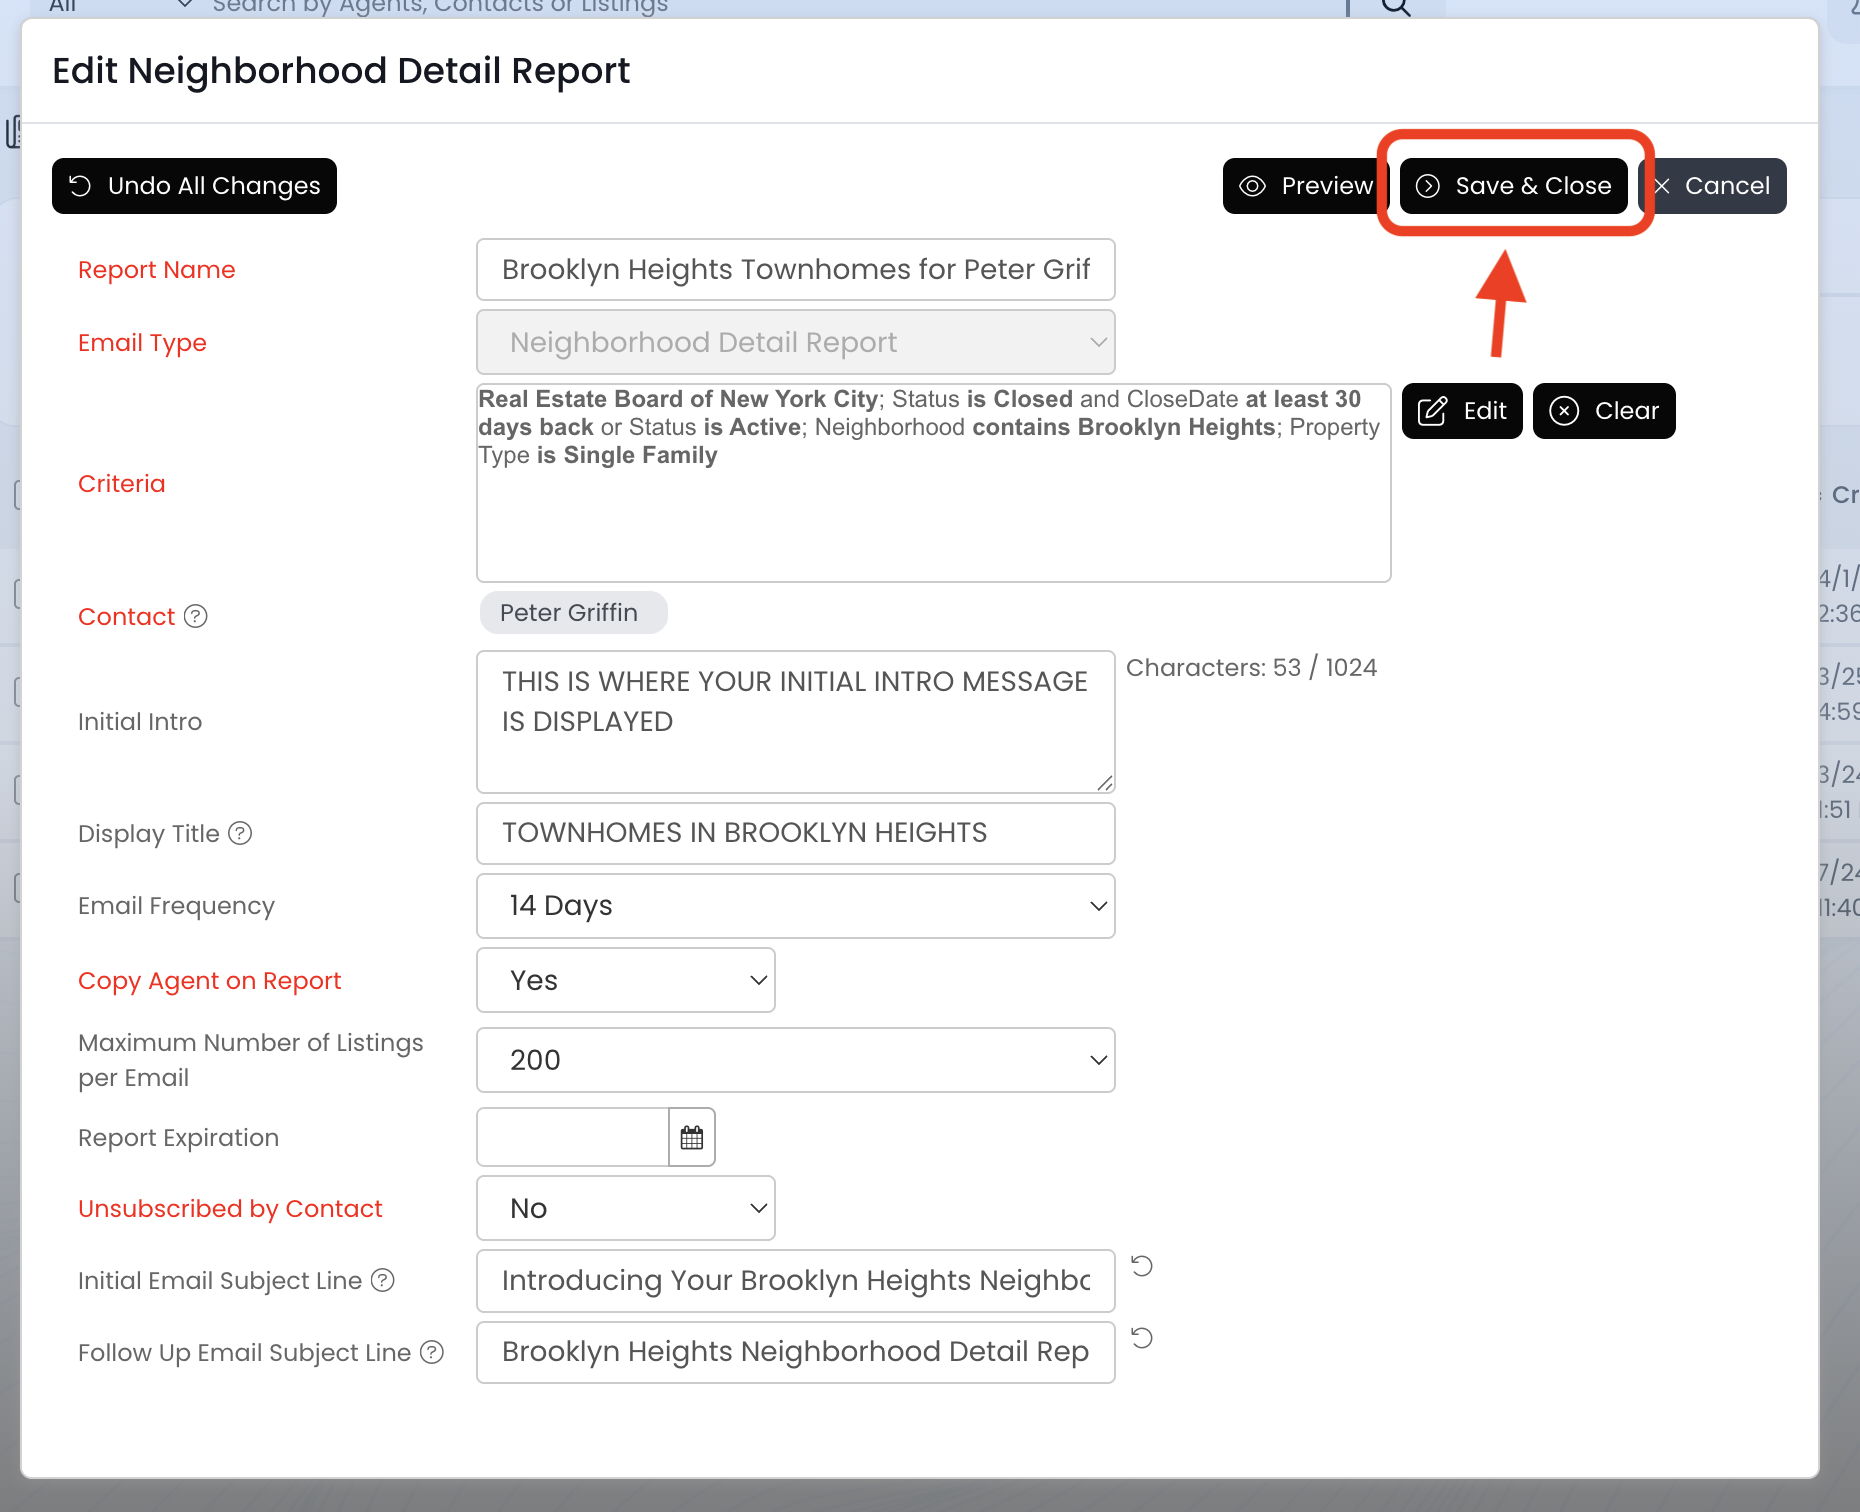
15.) Click the Save & Close button to save the report
- The contact(s) will receive a report shortly after saving.
- If you've set the Report Enabled field to NO, the contact(s) will not receive a report.
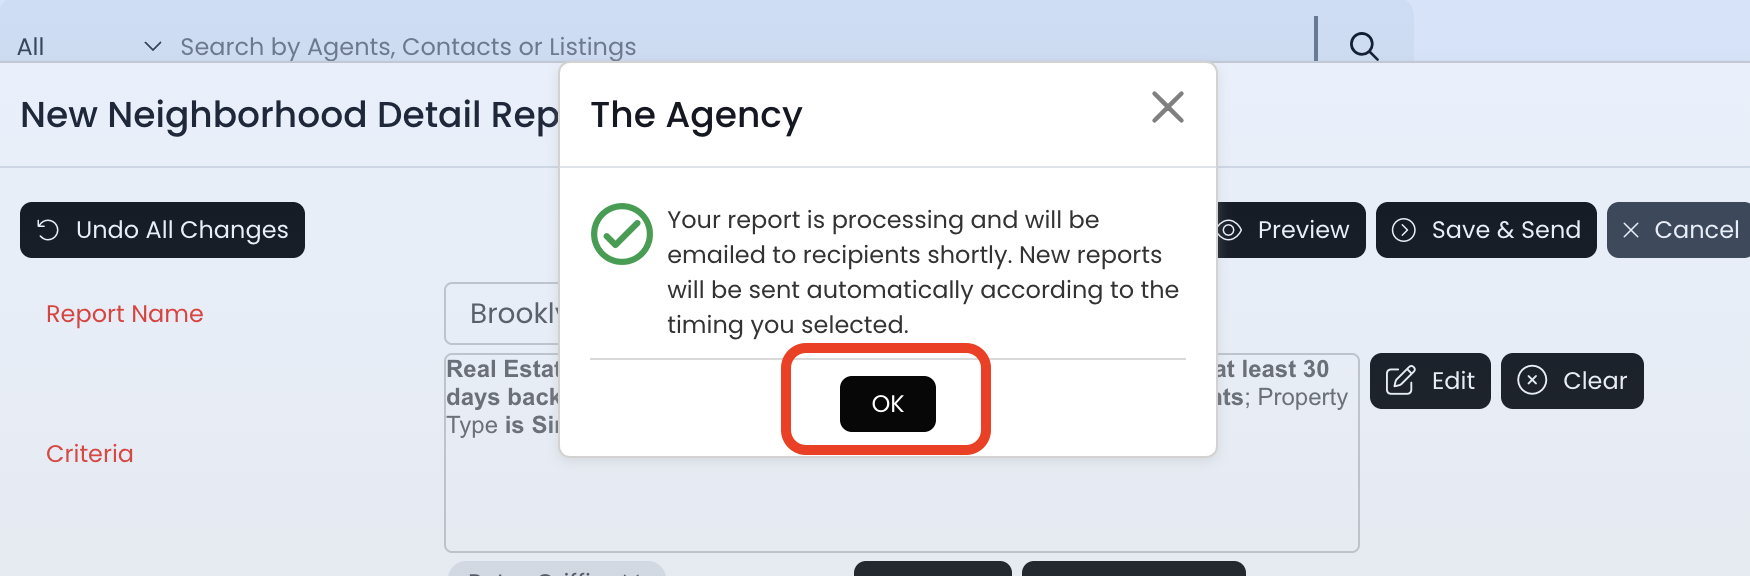
16.) Click on the OK button to exit
- This is confirmation that your report has been successfully saved
17.) Now you should see your report saved at the top